Online Sale!
100% Guaranteed Genuine Parts
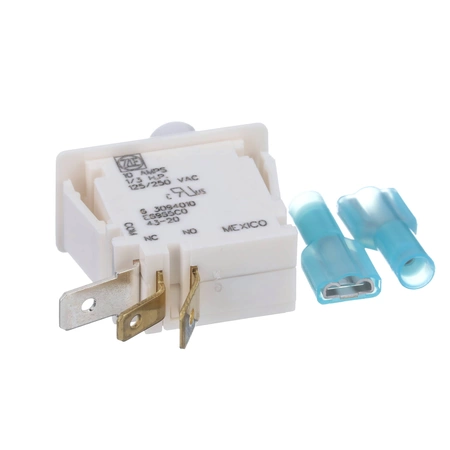
W10169313 Whirlpool Door Switch Kit
The Dryer Door Switch Assembly senses if the door of your dryer is properly closed. If the door handle is broken or your dryer does not start as expected, then the door switch could be damaged or defective. Note that this part also replaces older 2-terminal switches. Two connectors are also included. Replacing this part will require basic hand tools, minor disassembly of the dryer and novice repair experience. You must unplug the dryer or shut off the house circuit breaker for the appliance before installing this part. Helpful Tip: Take a digital photo of the current switch wiring configuration to aid when attaching the new part. A multimeter can be used to test the door switch for continuity before you begin this repair.
Part Specification
• This product is a Factory Certified Part. These three words represent quality parts and accessories designed specifically for your appliance. Time tested engineering that meets our strict quality specifications
• This product is a replacement part
• Package contains (1) Dryer Door Switch Assembly
• Tools Needed: Multi screwdriver
Weight : 0.04 lbs
Package Dimension : 3.78 x 1.54 x 1.02
Compatible Brands


About this product
The Dryer Door Switch Assembly senses if the door of your dryer is properly closed. If the door handle is broken or your dryer does not start as expected, then the door switch could be damaged or defective. Note that this part also replaces older 2-terminal switches. Two connectors are also included. Replacing this part will require basic hand tools, minor disassembly of the dryer and novice repair experience. You must unplug the dryer or shut off the house circuit breaker for the appliance before installing this part. Helpful Tip: Take a digital photo of the current switch wiring configuration to aid when attaching the new part. A multimeter can be used to test the door switch for continuity before you begin this repair.
Part Specification
• This product is a Factory Certified Part. These three words represent quality parts and accessories designed specifically for your appliance. Time tested engineering that meets our strict quality specifications
• This product is a replacement part
• Package contains (1) Dryer Door Switch Assembly
• Tools Needed: Multi screwdriver
Part Specification
• This product is a Factory Certified Part. These three words represent quality parts and accessories designed specifically for your appliance. Time tested engineering that meets our strict quality specifications
• This product is a replacement part
• Package contains (1) Dryer Door Switch Assembly
• Tools Needed: Multi screwdriver
Weight : 0.04 lbs
Package Dimension : 3.78 x 1.54 x 1.02
Step 1: Unplug the Washer
Unplug your Whirlpool washer from the wall outlet to prevent any electrical shock.
Step 2: Access the Door Switch
To access the door switch, you need to remove the top panel of the washer. Open up the washer lid and locate the two screws at the back of the top panel. Remove the two screws with a Phillips head screwdriver and gently lift up the top panel of the washer and set aside.
Step 3: Remove the Wiring Harness
Remove the wiring harness from the old door switch by unplugging it from the terminals. Be sure to unplug the correct connections by referencing the diagram on the side of the switch.
Step 4: Install the New Door Switch
Once the wiring harness is removed from the old door switch, you can now install the new W10169313 switch. Plug the wiring harness into the new switch and reconnect the connectors to their respective terminals.
Step 5: Re-install the Top Panel
Re-install the top panel by replacing the two screws and tightening them securely.
Step 6: Test the New Switch
Plug the washer back in and turn the power switch to ‘On’. Enable a test cycle to make sure the new switch is working properly.
You have now successfully replaced the W10169313 Whirlpool door switch.
Please keep in mind, these instructions are for general guidance and should always be used in conjunction with the manufacturer's manual, if available.


