Online Sale!
100% Guaranteed Genuine Parts
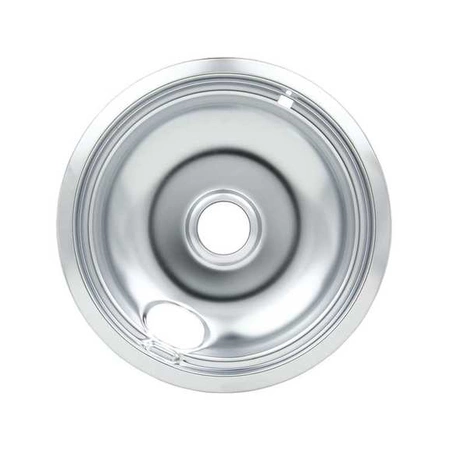
WPW10196405 Whirlpool 8" Chrome Drip Bowl
This Round Electric Range Burner Drip Bowl helps contain splatters and spills while you use your cooktop. If your current burner pans are damaged or can no longer be cleaned, you can replace them with this accessory. This chrome drip bowl is designed to be used with several major brand 8" burners; check to see if your model number is compatible. Drip bowls are sold separately. Installing this accessory will require no disassembly or repair experience. Be sure to unplug the range or shut off the house circuit breaker for the appliance before installing this part. Recommended Item: The 6" drip bowl is also available for purchase (item WPW10196406).
Part Specification
• This product is a Factory Certified Accessory. These three words represent quality parts and accessories designed specifically for your appliance. Time tested engineering that meets our strict quality specifications
• Package contains (1) Electric Range Round Burner Drip Bowl
• No tools required for installation
Weight : 1.94 lbs
Package Dimension : 7.36 x 7.99 x 2.05
Compatible Brands


About this product
This Round Electric Range Burner Drip Bowl helps contain splatters and spills while you use your cooktop. If your current burner pans are damaged or can no longer be cleaned, you can replace them with this accessory. This chrome drip bowl is designed to be used with several major brand 8" burners; check to see if your model number is compatible. Drip bowls are sold separately. Installing this accessory will require no disassembly or repair experience. Be sure to unplug the range or shut off the house circuit breaker for the appliance before installing this part. Recommended Item: The 6" drip bowl is also available for purchase (item WPW10196406).
Part Specification
• This product is a Factory Certified Accessory. These three words represent quality parts and accessories designed specifically for your appliance. Time tested engineering that meets our strict quality specifications
• Package contains (1) Electric Range Round Burner Drip Bowl
• No tools required for installation
Part Specification
• This product is a Factory Certified Accessory. These three words represent quality parts and accessories designed specifically for your appliance. Time tested engineering that meets our strict quality specifications
• Package contains (1) Electric Range Round Burner Drip Bowl
• No tools required for installation
Weight : 1.94 lbs
Package Dimension : 7.36 x 7.99 x 2.05
Step 1: Prepare Your Work Area
Before starting, make sure you have a clean, well-lit work area to work in. Gather all the necessary tools and materials, such as a Phillips head screwdriver, pliers, and the replacement WPW10196405 Whirlpool 8" Drip Bowl, Chrome.
Step 2: Disassemble the Old Drip Bowl
Switch off the power to the stove. Remove the burner grates and lift out the old drip bowl. Use the Phillips head screwdriver to loosen the screws holding the bowl in place. If necessary, use pliers to grip the screws more tightly.
Step 3: Clean and Install the New Drip Bowl
Use a cloth and mild cleaner to wipe away any grease and grime from the drip pan area. Fit the new WPW10196405 Whirlpool 8" Drip Bowl, Chrome in place and replace the screws to secure it. Make sure that everything is snug and secure.
Step 4: Test the Burner and Power On
Add some oil to the drip bowl and turn the burner on to ensure that it’s working correctly. After you’re satisfied with the results, switch the power back on and then place the burner grates back into position.
Your new WPW10196405 Whirlpool 8" Drip Bowl, Chrome is now installed and ready to use!
Please keep in mind, these instructions are for general guidance and should always be used in conjunction with the manufacturer's manual, if available.


