Online Sale!
100% Guaranteed Genuine Parts
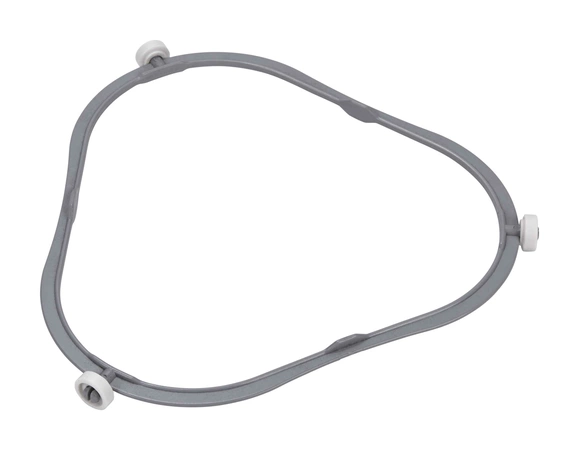
W11252182 Whirlpool Glass Tray Support
This Microwave Glass Tray Support holds and rotates the glass turntable inside the appliance during operation. To install, open the microwave door and position the new support ring right in the center of the appliance below the glass support tray. This accessory can be used with many appliance brands; check your model number to confirm compatibility. Installing this accessory will not require tools, disassembly or repair experience.
Part Specification
• This product is a Factory Certified Accessory. These three words represent quality parts and accessories designed specifically for your appliance. Time tested engineering that meets our strict quality specifications
• Package contains (1) Microwave Glass Tray Support
• No tools required for installation
Weight : 1.55 lbs
Package Dimension : 11.50 x 8.87 x 1.50
Compatible Brands


About this product
This Microwave Glass Tray Support holds and rotates the glass turntable inside the appliance during operation. To install, open the microwave door and position the new support ring right in the center of the appliance below the glass support tray. This accessory can be used with many appliance brands; check your model number to confirm compatibility. Installing this accessory will not require tools, disassembly or repair experience.
Part Specification
• This product is a Factory Certified Accessory. These three words represent quality parts and accessories designed specifically for your appliance. Time tested engineering that meets our strict quality specifications
• Package contains (1) Microwave Glass Tray Support
• No tools required for installation
Part Specification
• This product is a Factory Certified Accessory. These three words represent quality parts and accessories designed specifically for your appliance. Time tested engineering that meets our strict quality specifications
• Package contains (1) Microwave Glass Tray Support
• No tools required for installation
Weight : 1.55 lbs
Package Dimension : 11.50 x 8.87 x 1.50
The following parts are replaced by this product
- 8169331
- 8184102
- 8205778
- 8206227
- W10435114
- W10654906
- WPW10654906
Replacing the Whirlpool W11252182 RING-TURN
Step 1: Unplug the dryer from the wall outlet. Wear rubber gloves to protect your hands from getting burned.
Step 2: Remove the top panel of the dryer. Take out the screws located on the back of the dryer and then use a flat head screwdriver to release the clips attached to the top panel. Lift the panel to remove it from the dryer.
Step 3: Slide the lint filter out of the dryer. You will see a ring-turn assembly attached to the lint filter.
Step 4: Disconnect the power cord that connects the ring-turn to the dryer by pressing down on clip that is holding the cable in place.
Step 5: Pull the ring-turn off of the lint filter.
Step 6: Take the new ring-turn and attach it to the lint filter. Make sure it’s secured properly.
Step 7: Plug the power cord back into the dryer.
Step 8: Secure the top panel back onto the dryer. Reinsert the screws and then press down on the clips to make sure the panel is secure.
Step 9: Plug the dryer back into the wall outlet and test it out.
Please keep in mind, these instructions are for general guidance and should always be used in conjunction with the manufacturer's manual, if available.


