Online Sale!
100% Guaranteed Genuine Parts
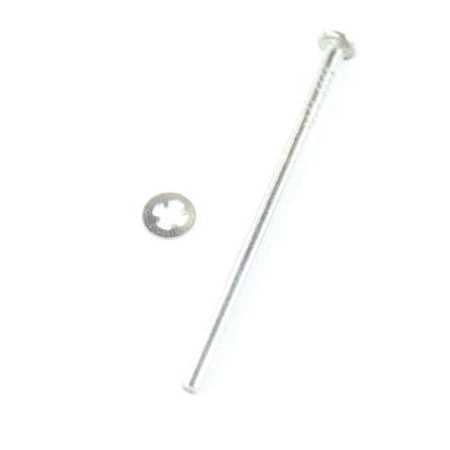
WP2198634 Whirlpool Door Pin
WP2198634 is an original equipment manufactured (OEM) part. Ensure your refrigerator operates smoothly with this essential fastener. Designed specifically for a variety of leading brands, this durable door pin ensures proper alignment and secure closure of your refrigerator door. It is compatible with Admiral, Amana, Jenn-Air, Kenmore, Kitchenaid, Magic Chef, Maytag, Norge, Roper, and Whirlpool models, making it a versatile addition to your appliance repair toolkit.
Engineered for long-lasting performance, this door pin is an ideal solution for maintaining the efficiency of your refrigerator. Easy to install, replacing your old or worn-out fastener can enhance your appliance’s performance and extend its lifecycle. Keep your kitchen organized and functioning at its best with this reliable replacement part, designed to meet the high standards you expect from Whirlpool and other trusted brands.
Weight : 0.02 lbs
Package Dimension : 2.50 x 0.37 x 0.37
Compatible Brands


About this product
WP2198634 is an original equipment manufactured (OEM) part. Ensure your refrigerator operates smoothly with this essential fastener. Designed specifically for a variety of leading brands, this durable door pin ensures proper alignment and secure closure of your refrigerator door. It is compatible with Admiral, Amana, Jenn-Air, Kenmore, Kitchenaid, Magic Chef, Maytag, Norge, Roper, and Whirlpool models, making it a versatile addition to your appliance repair toolkit.
Engineered for long-lasting performance, this door pin is an ideal solution for maintaining the efficiency of your refrigerator. Easy to install, replacing your old or worn-out fastener can enhance your appliance’s performance and extend its lifecycle. Keep your kitchen organized and functioning at its best with this reliable replacement part, designed to meet the high standards you expect from Whirlpool and other trusted brands.
Weight : 0.02 lbs
Package Dimension : 2.50 x 0.37 x 0.37
The following parts are replaced by this product
- 2198634
DIY Instructions to Replace the Whirlpool WP2198634 PIN-DOOR
1. First, turn off the power supply of your appliance. Make sure you unplug the refrigerator or, if your refrigerator is connected to a wall socket, switch off the circuit breaker.
2. Remove the refrigerator door by pulling out the top hinge and then slowly lifting the door up, away from the fridge.
3. Next, locate the pin-door which is usually found near the bottom hinge.
4. Use a flat head screwdriver to remove the screws that are holding the pin-door in place.
5. Carefully pull the pin-door out and set aside.
6. Take the new Whirlpool WP2198634 PIN-DOOR and carefully align it with the openings where the pin-door was previously located.
7. Secure the new pin-door by reinserting the screws that you had removed earlier.
8. Gently slide the refrigerator door back into place, making sure that the hinges are properly aligned.
9. Finally, reconnect the power supply and your DIY repair is complete!
Please keep in mind, these instructions are for general guidance and should always be used in conjunction with the manufacturer's manual, if available.
Please Verify Your Purchase to Submit a Review
Please note: We use this information only to confirm your purchase, it won’t be published.


