Online Sale!
100% Guaranteed Genuine Parts
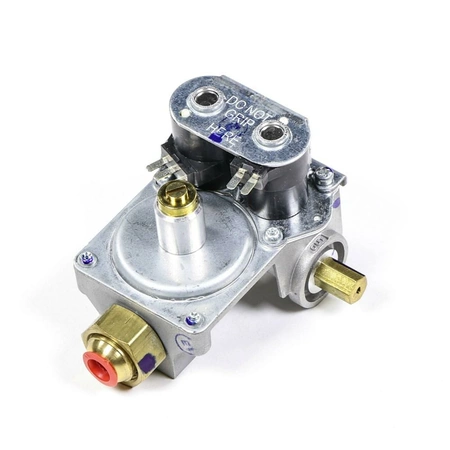
WP308345 Whirlpool Gas Valve Assembly
WP308345 is an original equipment manufactured (OEM) part. Ensure your dryer operates safely and efficiently with this high-quality gas valve assembly. Designed for optimal performance, this component is compatible with a variety of trusted brands, including Admiral, Amana, Jenn-Air, Kenmore, KitchenAid, Magic Chef, Maytag, Norge, Roper, and Whirlpool. Constructed to meet rigorous standards, the gas burner and control valve provide reliable functionality, making it an essential part for maintaining your appliance. Easy to install, this assembly can help restore your dryer to peak performance, ensuring it heats up quickly and consistently. Replace worn or damaged parts to extend the lifespan of your dryer and improve energy efficiency. This robust assembly is a smart choice for your appliance repair needs.
Weight : 1.51 lbs
Package Dimension : 5.50 x 5.25 x 6.50
Compatible Brands

About this product
WP308345 is an original equipment manufactured (OEM) part. Ensure your dryer operates safely and efficiently with this high-quality gas valve assembly. Designed for optimal performance, this component is compatible with a variety of trusted brands, including Admiral, Amana, Jenn-Air, Kenmore, KitchenAid, Magic Chef, Maytag, Norge, Roper, and Whirlpool. Constructed to meet rigorous standards, the gas burner and control valve provide reliable functionality, making it an essential part for maintaining your appliance. Easy to install, this assembly can help restore your dryer to peak performance, ensuring it heats up quickly and consistently. Replace worn or damaged parts to extend the lifespan of your dryer and improve energy efficiency. This robust assembly is a smart choice for your appliance repair needs.
Weight : 1.51 lbs
Package Dimension : 5.50 x 5.25 x 6.50
The following parts are replaced by this product
- 308345
Replacing the Whirlpool WP308345 VALVE- GAS
Replacing a gas valve on a Whirlpool stove can be challenging, but with a few simple tools, and this DIY guide, you'll be able to replace your WP308345 VALVE- GAS in no time.
Tools Needed:
-Screwdriver
-Socket wrench
-Replacement WP308345 VALVE-GAS
Step 1: Disconnect the power supply to the stove. Make sure all gas lines have been shut off before beginning.
Step 2: Remove the four screws at the back of the stove that hold the back panel in place. Carefully remove the back panel and set aside.
Step 3: Locate the old gas valve and disconnect the wires from it.
Step 4: Using your socket wrench, unscrew the retaining nut that holds the valve in place.
Step 5: Remove the old gas valve and discard.
Step 6: Insert the new WP308345 VALVE-GAS into the place where the old one was. Secure it with the socket wrench.
Step 7: Reconnect the wires to the new valve.
Step 8: Replace the back panel and secure it with the four screws.
Step 9: Turn on the gas supply lines and restore the power to the stove.
Step 10: Test the stove to make sure the new gas valve is working properly.
Please keep in mind, these instructions are for general guidance and should always be used in conjunction with the manufacturer's manual, if available.
Please Verify Your Purchase to Submit a Review
Please note: We use this information only to confirm your purchase, it won’t be published.


