Online Sale!
100% Guaranteed Genuine Parts
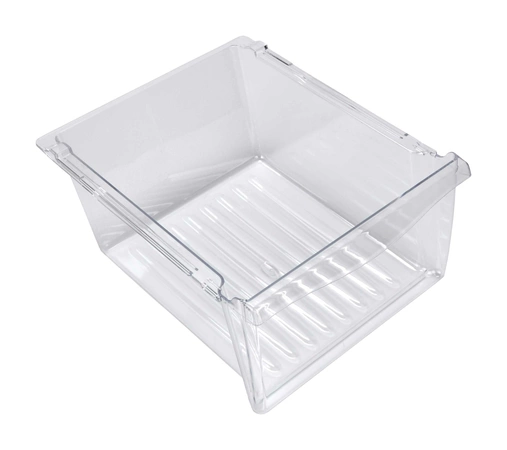
W10833528 Whirlpool Whirlpool Refrigerator Crisper Pan
The Refrigerator Crisper Drawer is a plastic bin designed to keep fruits and vegetables at their best for as long as possible. This a replacement drawer features a convenient pull handle and measure approximately 6-1/4" D x 12-1/2" W x 14-3/4" L. This part requires no tools or assembly to install.
Part Specification
• This product is a Factory Certified Part. These three words represent quality parts and accessories designed specifically for your appliance. Time tested engineering that meets our strict quality specifications
• This product is a replacement part
• Package contains (1) Refrigerator Crisper Drawer
• No tools required for installation
Weight : 31.08 lbs
Package Dimension : 19.69 x 11.57 x 18.00
Compatible Brands


About this product
The Refrigerator Crisper Drawer is a plastic bin designed to keep fruits and vegetables at their best for as long as possible. This a replacement drawer features a convenient pull handle and measure approximately 6-1/4" D x 12-1/2" W x 14-3/4" L. This part requires no tools or assembly to install.
Part Specification
• This product is a Factory Certified Part. These three words represent quality parts and accessories designed specifically for your appliance. Time tested engineering that meets our strict quality specifications
• This product is a replacement part
• Package contains (1) Refrigerator Crisper Drawer
• No tools required for installation
Part Specification
• This product is a Factory Certified Part. These three words represent quality parts and accessories designed specifically for your appliance. Time tested engineering that meets our strict quality specifications
• This product is a replacement part
• Package contains (1) Refrigerator Crisper Drawer
• No tools required for installation
Weight : 31.08 lbs
Package Dimension : 19.69 x 11.57 x 18.00
The following parts are replaced by this product
- 67002569
- 67001309
- 8170771
- 12531305
Replacing the W10833528 Whirlpool Refrigerator Crisper Drawer Pan Basket Bin
1. Shut off power to the refrigerator. Unplug the unit or flip the breaker in you home's breaker box.
2. Slide the refrigerator out of its nook so you can access all sides of the appliance, including the back panel.
3. Pull the bottom drawer off its track and set it aside. You may have to jiggle the drawer a bit in order to get it to come off the tracks.
4. Locate the screws that secure the crisper drawer assembly to the back wall. Remove the screws with a Phillips-head screwdriver.
5. Place your hands on both sides of the crisper drawer and gently pull it forward and out of the refrigerator. Take note of how the drawers fit into one another as you remove them.
6. Inspect the drawer for any signs of cracking or deterioration. If the drawer is cracked, replace it.
7. Line up the new drawer into the slides and metal tabs that hold it into the refrigerator cavity. Gently push on the drawer until it clicks into place.
8. Reinstall the screws that secure the drawer and reinsert the bottom drawer that was removed earlier.
9. Test the drawer by opening and closing it to make sure it is properly aligned and secure.
10. Plug the refrigerator back in and restore power to the appliance. Your new drawer is now installed
Please keep in mind, these instructions are for general guidance and should always be used in conjunction with the manufacturer's manual, if available.


