100% Guaranteed Genuine Parts
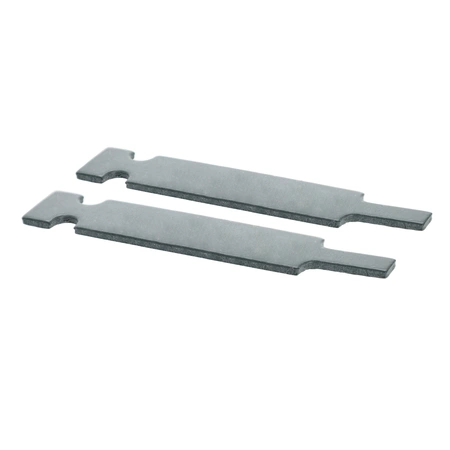
RB170003 Speed Queen Dryer Glide Kit for 1992 and Newer Models
Experience unparalleled efficiency and longevity with this replacement glide kit, perfect for 1992 and newer models of Speed Queen dryers. Designed specifically for Speed Queen, Amana, and Alliance appliances, this essential component ensures smooth drum rotation, enhancing performance and reducing wear. Crafted from high-quality materials, the glide kit guarantees durability and reliability, helping to extend the lifespan of your dryer. Whether you’re ensuring optimal operation or engaging in regular maintenance, this part is vital for restoring functionality and efficiency. Make the smart choice for your laundry needs and keep your appliance running smoothly with this essential upgrade.
Weight : 0.04 lbs
Package Dimension : 3.07 x 1.38 x 1.26
Compatible Brands


About this product
Experience unparalleled efficiency and longevity with this replacement glide kit, perfect for 1992 and newer models of Speed Queen dryers. Designed specifically for Speed Queen, Amana, and Alliance appliances, this essential component ensures smooth drum rotation, enhancing performance and reducing wear. Crafted from high-quality materials, the glide kit guarantees durability and reliability, helping to extend the lifespan of your dryer. Whether you’re ensuring optimal operation or engaging in regular maintenance, this part is vital for restoring functionality and efficiency. Make the smart choice for your laundry needs and keep your appliance running smoothly with this essential upgrade.
Weight : 0.04 lbs
Package Dimension : 3.07 x 1.38 x 1.26
Replacing the RB170003 Speed Queen Dryer Glide Kit (1992 & Newer SM Dryer Models)
This guide will provide step-by-step instructions on how to replace the RB170003 Speed Queen Dryer Glide Kit in 1992 and newer SM dryer models.
Tools Required:
• Screwdriver
• Phillips Head Screwdriver
• Socket Wrench
• Pliers
• Flashlight
• Heat-resistant gloves
• RB170003 Speed Queen Dryer Glide Kit
Step 1: Disconnect power to the dryer. To ensure the safety of yourself, turn off the power to the dryer at the circuit breaker.
Step 2: Remove the top of the dryer. Using a screwdriver, remove the top panel of the dryer by removing the screws at the back of the dryer unit. Once the screws are removed, lift the panel to access the interior of the dryer.
Step 3: Locate the glide kit. With a flashlight, look for the glide kit and its components. This will be located around the drum in the dryer.
Step 4: Remove the worn glide kit. Make sure to wear heat-resistant gloves as you may come into contact with the hot parts of the dryer. Using a socket wrench, remove the four bolts which are attached to the glide kit. Gently lift the glide kit out of the dryer.
Step 5: Install the new glide kit. Carefully, insert the new glide kit into the drum. Using the same process, bolt the new glide kit in place.
Step 6: Test the new glide kit. Plug the power cable back into the wall outlet and turn the power switch on at the circuit breaker. Start the dryer and observe if there is any noise or vibrations coming from the glide kit. If everything seems ok, then the replacement is successful.
Step 7: Secure the top panel. Replace the screws to the back of the dryer and reattach the top panel of the dryer.
Congratulations, you have successfully replaced the glide kit for the RB170003 Speed Queen Dryer!
Please keep in mind, these instructions are for general guidance and should always be used in conjunction with the manufacturer's manual, if available.


