Online Sale!
100% Guaranteed Genuine Parts
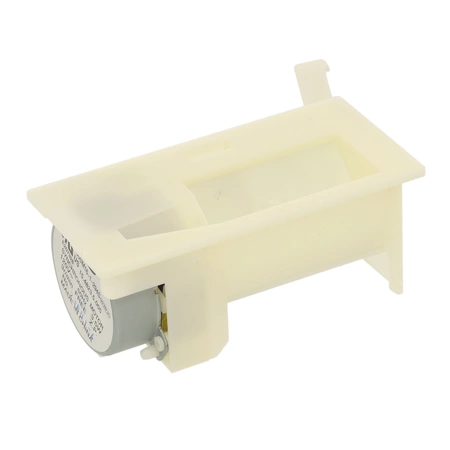
WPW10196393 Whirlpool Control Damper
The SxS Refrigerator Air Damper Control Assembly controls the cold airflow from the freezer compartment into the refrigerator compartment. Common reasons for replacing the damper control is if the freezer is the correct temperature but the fridge is too cold or not cold enough. The damper control is located in the freezer inside the ice maker assembly. You will need to remove the ice maker from your refrigerator to access this part. Replacing this part will require basic hand tools, some disassembly of the refrigerator and novice repair experience. You must unplug the refrigerator or shut off the house circuit breaker for the refrigerator before installing this part.
Part Specification
• This product is a Factory Certified Part. These three words represent quality parts and accessories designed specifically for your appliance. Time tested engineering that meets our strict quality specifications
• This product is a replacement part
• Package contains (1) SxS Refrigerator Air Damper Control Assembly
• Tools Needed: Multi screwdriver
Weight : 0.50 lbs
Package Dimension : 6.93 x 4.21 x 2.40
Compatible Brands


About this product
The SxS Refrigerator Air Damper Control Assembly controls the cold airflow from the freezer compartment into the refrigerator compartment. Common reasons for replacing the damper control is if the freezer is the correct temperature but the fridge is too cold or not cold enough. The damper control is located in the freezer inside the ice maker assembly. You will need to remove the ice maker from your refrigerator to access this part. Replacing this part will require basic hand tools, some disassembly of the refrigerator and novice repair experience. You must unplug the refrigerator or shut off the house circuit breaker for the refrigerator before installing this part.
Part Specification
• This product is a Factory Certified Part. These three words represent quality parts and accessories designed specifically for your appliance. Time tested engineering that meets our strict quality specifications
• This product is a replacement part
• Package contains (1) SxS Refrigerator Air Damper Control Assembly
• Tools Needed: Multi screwdriver
Part Specification
• This product is a Factory Certified Part. These three words represent quality parts and accessories designed specifically for your appliance. Time tested engineering that meets our strict quality specifications
• This product is a replacement part
• Package contains (1) SxS Refrigerator Air Damper Control Assembly
• Tools Needed: Multi screwdriver
Weight : 0.50 lbs
Package Dimension : 6.93 x 4.21 x 2.40
The following parts are replaced by this product
- 67006116
- W10127429
- W10196393
Step 1: Safety First - Before repairing any appliance, make sure to unplug it and turn off the power source.
Step 2: Removal – Unscrew the screws that secure the front panel of the Whirlpool WPW10196393 control. Carefully remove the panel and set aside.
Step 3: Disconnect – Disconnect the wires from the old control panel and carefully pull out the old control unit.
Step 4: Installation – Take the new Whirlpool WPW10196393 control and connect the wires according to the polarity marking on the back of the unit. Secure the panel with the screws removed in step 2.
Step 5: Test – Plug in your appliance and turn on the power source. Check for proper operation and make sure all features are working properly.
Please keep in mind, these instructions are for general guidance and should always be used in conjunction with the manufacturer's manual, if available.


