Online Sale!
100% Guaranteed Genuine Parts
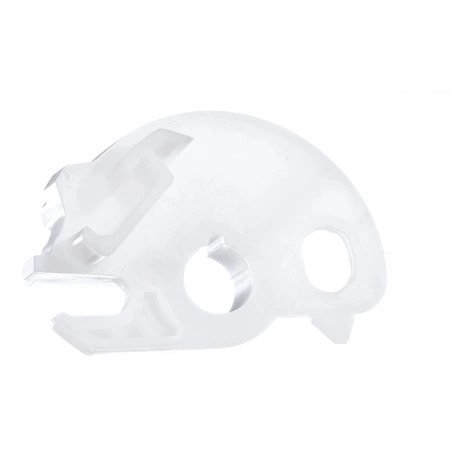
W10562613 Whirlpool Microwave Interlock Cam Assembly
Interlock cam plate works with some Whirlpool, Jenn-Air, Kenmore, KitchenAid, Maytag, Amana, Magic Chef, Admiral, Norge, and Roper models of microwaves.
Weight : 0.01 lbs
Package Dimension : 1.00 x 1.00 x 0.75
Compatible Brands


About this product
Interlock cam plate works with some Whirlpool, Jenn-Air, Kenmore, KitchenAid, Maytag, Amana, Magic Chef, Admiral, Norge, and Roper models of microwaves.
Weight : 0.01 lbs
Package Dimension : 1.00 x 1.00 x 0.75
The following parts are replaced by this product
- W10156811
- W10508437
Replacing the W10562613 Whirlpool Microwave Interlock Cam Plate: A DIY Guide
Replacing the W10562613 Whirlpool microwave interlock cam plate is a relatively easy job for most DIYers, and can be done in a few simple steps. This guide will walk you through the process of replacing the interlock cam plate, from opening the case of your microwave to finalizing the installation.
Things You Will Need:
- W10562613 Whirlpool microwave interlock cam plate
- Phillips screwdriver
- Flathead screwdriver
- Glove
- Safety glasses
Step 1: Unplug the Microwave
Start by unplugging your microwave from the power outlet. Then remove all screws from the wall trim of the appliance, using a Phillips screwdriver. After that, pull out the microwave until it is exposed and you can see the mounting bracket on the wall.
Step 2: Remove the Mounting Bracket and Expose the Internal Parts
Once you have successfully removed the mounting bracket, you will expose the internal parts of your microwave. Carefully use a flat head screwdriver to remove the screws which secure the side panels of your appliance. Once these screws are removed, you can slide off the side panels and access the interior of your microwave.
Step 3:Remove the old Interlock Cam Plate
Now that you have access to the internal parts of your microwave, locate the old interlock cam plate. Use the flathead screwdriver to unscrew the two screws that secure the plate in place.
Step 4: Install the New Interlock Cam Plate
Next, take the new interlock cam plate and align it with the holes of the microwave. Secure the plate using the two screws and tighten with the same screwdriver.
Step 5: Reassemble Your Microwave
Once the new interlock cam plate is in place, you can reassemble the rest of your microwave. Begin by sliding the side panels back into place and securely fastening the screws. After that, replace the wall trim and secure with the Phillips screwdriver.
Step 6: Test the New Interlock Cam Plate
Finally, plug in your microwave and test the new interlock cam plate. Open and close the door several times to ensure everything is working properly. If everything looks okay, you have completed the installation!
Please keep in mind, these instructions are for general guidance and should always be used in conjunction with the manufacturer's manual, if available.


