Online Sale!
100% Guaranteed Genuine Parts
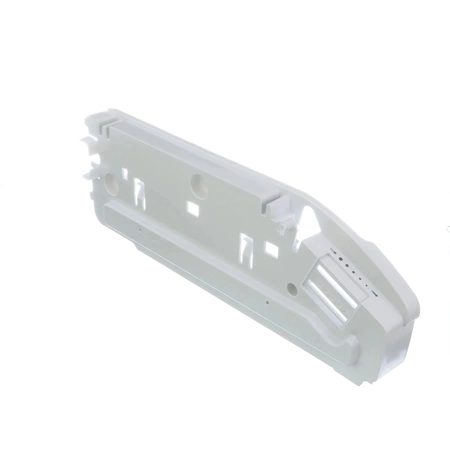
WP12656018 Whirlpool Drawer Support
The Refrigerator Drawer Support Rail guides the right side of the appliance’s pantry drawer so that you can pull the drawer out with ease. If your refrigerator’s current support rail with end cap on the right side is broken or missing, you can easily replace the item with this part. Installation will require basic hand tools, minor disassembly of the unit and novice repair experience. Remember to unplug the refrigerator or shut off the house circuit breaker for the appliance before installing this part. Helpful Tip: Also consider replacing the left-hand Drawer Support Rail (item 1534561) at the same time that you install this part.
Part Specification
• This product is a Factory Certified Part. These three words represent quality parts and accessories designed specifically for your appliance. Time tested engineering that meets our strict quality specifications
• This product is a replacement part
• Package contains (1) Refrigerator Drawer Support Rail
• Tools Needed: Multi screwdriver
Weight : 7.20 lbs
Package Dimension : 21.30 x 10.47 x 4.49
Compatible Brands


About this product
The Refrigerator Drawer Support Rail guides the right side of the appliance’s pantry drawer so that you can pull the drawer out with ease. If your refrigerator’s current support rail with end cap on the right side is broken or missing, you can easily replace the item with this part. Installation will require basic hand tools, minor disassembly of the unit and novice repair experience. Remember to unplug the refrigerator or shut off the house circuit breaker for the appliance before installing this part. Helpful Tip: Also consider replacing the left-hand Drawer Support Rail (item 1534561) at the same time that you install this part.
Part Specification
• This product is a Factory Certified Part. These three words represent quality parts and accessories designed specifically for your appliance. Time tested engineering that meets our strict quality specifications
• This product is a replacement part
• Package contains (1) Refrigerator Drawer Support Rail
• Tools Needed: Multi screwdriver
Part Specification
• This product is a Factory Certified Part. These three words represent quality parts and accessories designed specifically for your appliance. Time tested engineering that meets our strict quality specifications
• This product is a replacement part
• Package contains (1) Refrigerator Drawer Support Rail
• Tools Needed: Multi screwdriver
Weight : 7.20 lbs
Package Dimension : 21.30 x 10.47 x 4.49
The following parts are replaced by this product
- 67002325
- 67003047
- 8171063
- 67004725
- 67005859
- 67005857
- 8208282
- 67005860
- 12656018
- 12656020
- 12656021
- WP12656020
Replacing the WP12656018 Whirlpool Endcap Right Side
DIY Instructions
1. Unplug your dryer from the wall outlet.
2. Pull the dryer away from the wall.
3. Find the screws on the back of the dryer that hold the rear panel in place.
4. Remove the screws using a Phillips-head screwdriver.
5. Pull off the rear panel to expose the inside of the dryer.
6. Locate the endcap on the right side of the dryer.
7. Use a nut driver to remove the screws that hold the endcap in place.
8. Pull off the old endcap and set aside.
9. Insert the new WP12656018 Whirlpool Endcap Right Side into place.
10. Secure the endcap with the screws removed previously.
11. Replace the back panel and secure with the screws.
12. Plug the dryer back in and push it back up against the wall.
13. Test your dryer to make sure the endcap replacement was successful.
Please keep in mind, these instructions are for general guidance and should always be used in conjunction with the manufacturer's manual, if available.


