Online Sale!
100% Guaranteed Genuine Parts
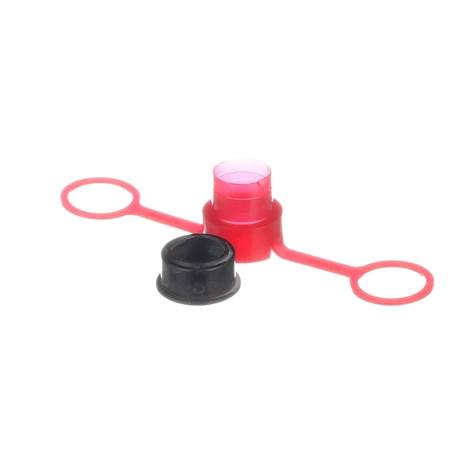
207843 Whirlpool Seal Repair Kit
Ensure your washing machine operates at its best with this high-quality seal repair kit. Designed specifically for Whirlpool and compatible with leading brands such as Admiral, Amana, Jenn-Air, Kenmore, Kitchenaid, Magic Chef, Maytag, Norge, and Roper, this gasket and seal kit effectively addresses leaks that can hinder performance.
Constructed from durable materials, it guarantees a long-lasting and reliable solution for your washer. Easy to install, this repair kit provides everything you need to restore the integrity of your appliance, enhancing its efficiency and extending its lifespan. Avoid costly repairs and maintain your washer’s performance with this essential part. Keep your laundry routine seamless and worry-free by selecting this dependable seal repair kit.
Weight : 1.51 lbs
Package Dimension : 5.50 x 5.25 x 6.50
Compatible Brands


About this product
Ensure your washing machine operates at its best with this high-quality seal repair kit. Designed specifically for Whirlpool and compatible with leading brands such as Admiral, Amana, Jenn-Air, Kenmore, Kitchenaid, Magic Chef, Maytag, Norge, and Roper, this gasket and seal kit effectively addresses leaks that can hinder performance.
Constructed from durable materials, it guarantees a long-lasting and reliable solution for your washer. Easy to install, this repair kit provides everything you need to restore the integrity of your appliance, enhancing its efficiency and extending its lifespan. Avoid costly repairs and maintain your washer’s performance with this essential part. Keep your laundry routine seamless and worry-free by selecting this dependable seal repair kit.
Weight : 1.51 lbs
Package Dimension : 5.50 x 5.25 x 6.50
The following parts are replaced by this product
- 206602
- 215962
- 35-2010
Step 1: Start by unplugging the refrigerator from the wall and sliding it out away from the wall.
Step 2: Locate the model number and make of your refrigerator, as well as the part needed to replace the Whirlpool 207843 lip seal repair kit.
Step 3: Place a dry cloth on the floor to absorb any liquid that might come out of your refrigerator while performing the repair.
Step 4: Remove the old lip seal repair kit from your refrigerator. To do this, use a screwdriver to loosen the mounting screws securing the kit in place. Take care not to damage the refrigerator by using too much force.
Step 5: Insert the new kit into the refrigerator and secure it in place with the mounting screws. Make sure the seal is properly secured and its edges are flush with the internal refrigerator walls.
Step 6: Plug the refrigerator back into the wall outlet.
Step 7: Perform a test to make sure the replacement lip seal is working correctly. Open and close your refrigerator door multiple times and check if the seal is working as expected.
Step 8: Repeat steps 1-7 if the seal is not working correctly.
Please keep in mind, these instructions are for general guidance and should always be used in conjunction with the manufacturer's manual, if available.


