Online Sale!
100% Guaranteed Genuine Parts
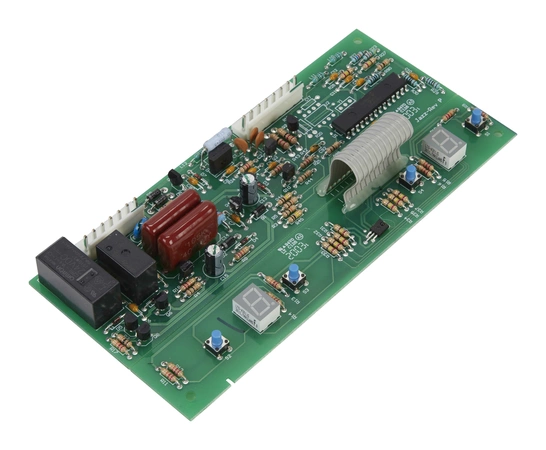
WPW10503278 Whirlpool Refrigerator Electronic Control Board
The Refrigerator Main Control Board manages the functions of the refrigerator, such as cooling and defrost times. This part is located behind a panel on the back of your refrigerator. If your refrigerator is no longer cooling as expected or won't defrost, replacing this part may alleviate these issues. Replacing this part will require basic hand tools, some disassembly of the refrigerator and novice repair experience. You must unplug the refrigerator or shut off the house circuit breaker for the appliance before installing this part. Also turn off the refrigerator's water supply before you begin.
Part Specification
• This product is a Factory Certified Part. These three words represent quality parts and accessories designed specifically for your appliance. Time tested engineering that meets our strict quality specifications
• This product is a replacement part
• Package contains (1) Refrigerator Main Control Board
• Tools Needed: Multi screwdriver
Weight : 0.86 lbs
Package Dimension : 10.43 x 4.61 x 2.48
Compatible Brands


About this product
The Refrigerator Main Control Board manages the functions of the refrigerator, such as cooling and defrost times. This part is located behind a panel on the back of your refrigerator. If your refrigerator is no longer cooling as expected or won't defrost, replacing this part may alleviate these issues. Replacing this part will require basic hand tools, some disassembly of the refrigerator and novice repair experience. You must unplug the refrigerator or shut off the house circuit breaker for the appliance before installing this part. Also turn off the refrigerator's water supply before you begin.
Part Specification
• This product is a Factory Certified Part. These three words represent quality parts and accessories designed specifically for your appliance. Time tested engineering that meets our strict quality specifications
• This product is a replacement part
• Package contains (1) Refrigerator Main Control Board
• Tools Needed: Multi screwdriver
Part Specification
• This product is a Factory Certified Part. These three words represent quality parts and accessories designed specifically for your appliance. Time tested engineering that meets our strict quality specifications
• This product is a replacement part
• Package contains (1) Refrigerator Main Control Board
• Tools Needed: Multi screwdriver
Weight : 0.86 lbs
Package Dimension : 10.43 x 4.61 x 2.48
The following parts are replaced by this product
- 12002339
- 12002449
- 12002509
- 12002567
- 12002706
- 8208187
- 67006214
- 67006740
- W10165748
- 12868513
- 12784415
- W10503278
- 12002445
Step 1: Unplug Your Refrigerator – Before beginning the process of replacing the WPW10503278 Whirlpool Refrigerator Electronic Control Board, be sure to unplug your refrigerator from the wall.
Step 2: Locate the Damaged Control Board – Access the back panel of your refrigerator. Carefully pull it back enough to access the control board and wires. Identify and locate the damaged WPW10503278 Whirlpool Refrigerator Electronic Control Board.
Step 3: Disconnect Wiring Harness – Disconnect the wiring harness connected to the damaged control board. Make note of which wires go where for an easier re-connection when installing a new electronic control board.
Step 4: Install New Control Board - Take the new WPW10503278 Whirlpool Refrigerator Electronic Control Board and place it over the opening left from removing the old board. Secure it in place using the same screws that held the old board.
Step 5: Reconnect Wiring Harness – Now reconnect the wiring harness to the new control board. Line up the pins and make sure you are reconnecting the correct wires to the correct places (referring back to step 3).
Step 6: Test Control Board – After making sure all connections have been made properly, plug the refrigerator back into the wall and turn it on. Allow the refrigerator to run and test the newly installed control board.
Step 7: Cleanup - Discard the old control board and any other materials used during the replacement process.
Please keep in mind, these instructions are for general guidance and should always be used in conjunction with the manufacturer's manual, if available.


