Online Sale!
100% Guaranteed Genuine Parts
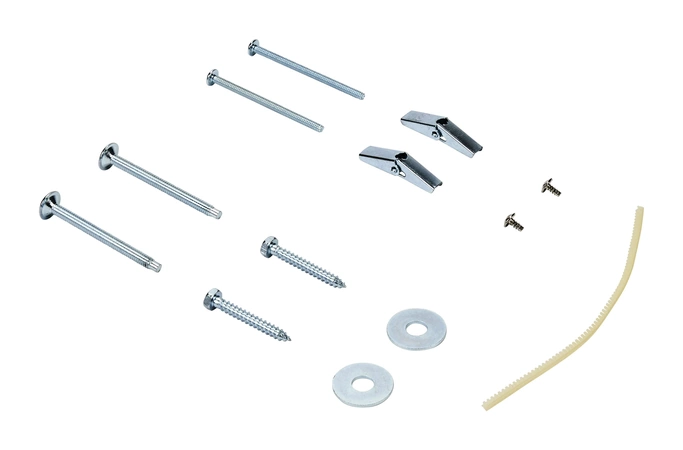
W10821385 Whirlpool Hardware Kit
Elevate the performance of your microwave with this essential fastener kit from Whirlpool. Designed for compatibility with a range of respected brands including Admiral, Amana, Jenn-Air, Kenmore, Kitchenaid, Magic Chef, Maytag, Norge, Roper, and Whirlpool, this hardware kit ensures a reliable fit and durable support for your appliance. Made specifically for microwave parts, it features high-quality construction that resists wear and ensures long-lasting functionality. Whether you're performing routine maintenance or completing a repair, this fastener kit is the ideal solution to keep your microwave running smoothly. Trust in Whirlpool's commitment to quality and reliability for all your microwave needs. Optimize your appliance today!
Weight : 0.03 lbs
Package Dimension : 2.60 x 1.26 x 1.30
Compatible Brands


About this product
Elevate the performance of your microwave with this essential fastener kit from Whirlpool. Designed for compatibility with a range of respected brands including Admiral, Amana, Jenn-Air, Kenmore, Kitchenaid, Magic Chef, Maytag, Norge, Roper, and Whirlpool, this hardware kit ensures a reliable fit and durable support for your appliance. Made specifically for microwave parts, it features high-quality construction that resists wear and ensures long-lasting functionality. Whether you're performing routine maintenance or completing a repair, this fastener kit is the ideal solution to keep your microwave running smoothly. Trust in Whirlpool's commitment to quality and reliability for all your microwave needs. Optimize your appliance today!
Weight : 0.03 lbs
Package Dimension : 2.60 x 1.26 x 1.30
The following parts are replaced by this product
- 8206614
- W10811221
Step 1: Turn off the power supply to the humidifier. If it is connected to an electrical outlet, unplug the cord from the wall outlet. If it is hard-wired, shut off the breaker to the appropriate circuit.
Step 2: Remove the humidifier's cover or access panel. Depending on your model, you may have to unscrew the panel or simply remove a clip.
Step 3: Disconnect the power wires from the humidifier. The connections are usually color-coded. Note where each wire is connected and then use a screwdriver to loosen the connection screw.
Step 4: Take off the old filter.
Step 5: Remove the mounting screws that attach the unit to the wall and carefully lower the unit to the ground.
Step 6: Plug in the new humidifier and secure it onto the wall. Connect the power wires to their respective terminals.
Step 7: Place the filter into the slot of the new unit and reattach the cover or access panel.
Step 8: Turn on the power supply to the humidifier. If it is connected to an electrical outlet, plug the cord into the wall outlet. If it is hard-wired, turn on the breaker to the appropriate circuit.
Step 9: Adjust the settings on the new unit as desired.
Please keep in mind, these instructions are for general guidance and should always be used in conjunction with the manufacturer's manual, if available.


