Online Sale!
100% Guaranteed Genuine Parts
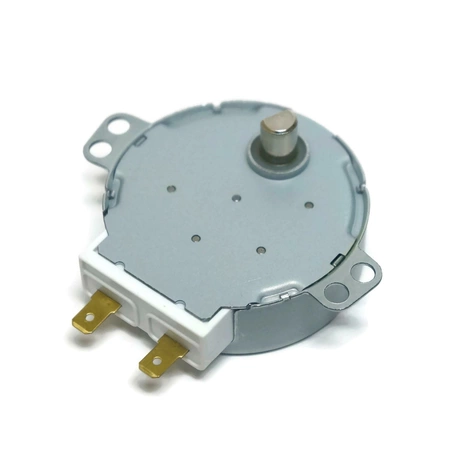
WPW10466420 Whirlpool Turntable Motor
WPW10466420 Whirlpool Turntable Motor
Weight : 0.03 lbs
Package Dimension : 2.37 x 2.00 x 1.25
Compatible Brands


About this product
WPW10466420 Whirlpool Turntable Motor
Weight : 0.03 lbs
Package Dimension : 2.37 x 2.00 x 1.25
The following parts are replaced by this product
- W10210848
- W10466420
How to Replace a WPW10466420 Whirlpool Turntable Motor
Replacing your Whirlpool Turntable Motor can be an intimidating task for the inexperienced, but with a few tools and careful instructions, you can repair your turntable with ease. Here is a step-by-step guide on how to replace the WPW10466420 Whirlpool Turntable Motor.
Tools Needed:
• Phillips head screwdriver
• Slot head screwdriver
• Pliers
• WD40
Step 1: Unplug the power cord from the wall outlet. Removing the power will prevent any accidental shocks as you work.
Step 2: Inspect the motor’s wiring harnesses and make sure they are not burned or otherwise damaged. If they are, replace the wiring harnesses before continuing.
Step 3: Take out the screws and remove the bottom plate of the motor with a Phillips head screwdriver. Be sure to keep all of the screws in a safe place, as you will need them to put the motor together later.
Step 4: Once the bottom plate is removed, unscrew the bolts that secure the motor in place. Carefully remove the old motor and set it aside.
Step 5: Apply WD40 to the new motor's mounting holes and insert it into place. Secure the motor with the screws and nuts that were used to take out the old motor.
Step 6: Reattach the wiring harnesses to the new motor's terminals, using a slot head screwdriver. Before replacing the cover, double-check to make sure that all wires are securely connected.
Step 7: Replace the bottom plate of the motor, using the screws that were removed earlier.
Step 8: Plug the power cord back into the wall outlet and turn on the turntable.
Your WPW10466420 WhirlpoolTurntable Motor has now been replaced. Enjoy your turntable and be sure to practice regular maintenance to ensure that your motor stays in good working condition.
Please keep in mind, these instructions are for general guidance and should always be used in conjunction with the manufacturer's manual, if available.


