Online Sale!
100% Guaranteed Genuine Parts
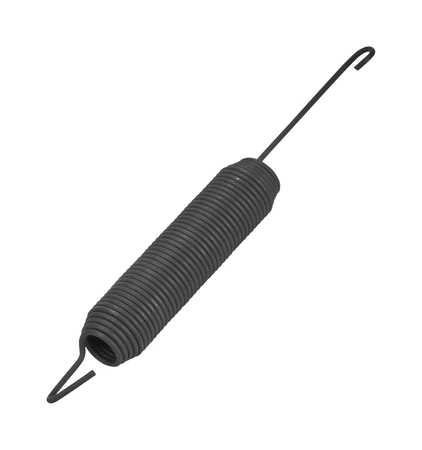
WP9743986 Whirlpool Spring
Whirlpool KitchenAid Roper Amana Jenn-Air Maytag Gaffers and Sattler Magic Chef Sears Kenmore Admiral Dishwasher Door Spring 9743986
We are a Factory Authorized Parts Distributor for Whirlpool Maytag. Trust us for all of your Whirlpool Maytag appliance parts and accessories needs.
We are a Factory Authorized Parts Distributor for Whirlpool Maytag. Trust us for all of your Whirlpool Maytag appliance parts and accessories needs.
Weight : 0.14 lbs
Package Dimension : 6.34 x 1.85 x 1.61
Compatible Brands


About this product
Whirlpool KitchenAid Roper Amana Jenn-Air Maytag Gaffers and Sattler Magic Chef Sears Kenmore Admiral Dishwasher Door Spring 9743986
We are a Factory Authorized Parts Distributor for Whirlpool Maytag. Trust us for all of your Whirlpool Maytag appliance parts and accessories needs.
We are a Factory Authorized Parts Distributor for Whirlpool Maytag. Trust us for all of your Whirlpool Maytag appliance parts and accessories needs.
Weight : 0.14 lbs
Package Dimension : 6.34 x 1.85 x 1.61
The following parts are replaced by this product
- 9743986
- 3379643
DIY Guide to Replacing the Whirlpool WP9743986 Spring
Replacing the spring on a Whirlpool appliance can be a tricky task. If you’re comfortable with doing some minor home repairs, though, then this guide will help walk you through the process of replacing the Whirlpool WP9743986 Spring. Here’s what you’ll need to get started:
• A Phillips screwdriver
• The new Whirlpool WP9743986 spring
• Gloves
Step 1: Unplug the appliance and make sure it is disconnected from any power sources.
Step 2: Locate the access panel on the back of the appliance that covers the spring. It might be covered by some plastic or tape.
Step 3: Once you’ve located the panel, use the Phillips screwdriver to remove the screws that hold the panel in place. Carefully set the screws aside to be reused later.
Step 4: Next, locate the spring. It should be easy to spot, but if you have any trouble, consult your owner’s manual or the appliance’s user guide.
Step 5: Unhook the spring from its mount and carefully remove it. Once you’ve removed the old spring, put on your gloves and handle the new Whirlpool WP9743986 spring carefully.
Step 6: Hook the new spring into its mount and make sure it is securely attached.
Step 7: Replace the access panel and screws.
Step 8: Reconnect the power source and turn on the appliance to make sure the spring is functioning properly.
And that’s it – you’ve successfully replaced the Whirlpool WP9743986 spring! Now that the project is complete, you can enjoy the peace of mind that comes with knowing your appliance is functioning safely and correctly.
Please keep in mind, these instructions are for general guidance and should always be used in conjunction with the manufacturer's manual, if available.
Please Verify Your Purchase to Submit a Review
Please note: We use this information only to confirm your purchase, it won’t be published.


