Online Sale!
100% Guaranteed Genuine Parts
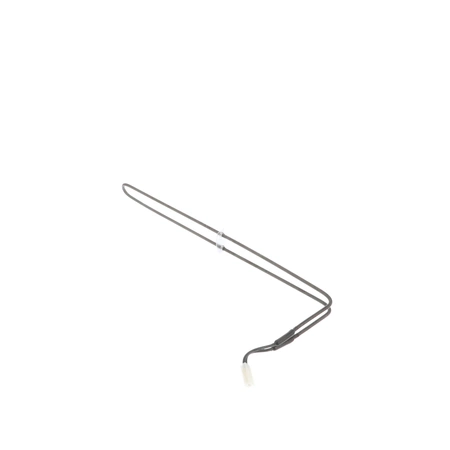
WP2263749 Whirlpool Defrost Heater Assembly
The SxS Refrigerator Defrost Heater melts frost from the evaporator of the appliance throughout the automatic defrost cycle that occurs during normal operation. If the evaporator is freezing up and affecting the performance of the refrigerator, replacing the defrost heater may alleviate this issue. Remove the shelving and the rails in your freezer to gain access to the part behind the back panel. Installing this part will require basic hand tools, minor disassembly of the refrigerator and novice repair experience. Remember to unplug the refrigerator or shut off the house circuit breaker for the appliance before installing this part. Recommended Item: Consider replacing the Defrost Thermostat (item WP4387490) at the same time you complete this repair.
Part Specification
• This product is a Factory Certified Part. These three words represent quality parts and accessories designed specifically for your appliance. Time tested engineering that meets our strict quality specifications
• This product is a replacement part
• Package contains (1) SxS Refrigerator Defrost Heater
• Tools Needed: Multi screwdriver, wire splicing tool
Weight : 5.87 lbs
Package Dimension : 31.44 x 11.19 x 2.32
Compatible Brands


About this product
The SxS Refrigerator Defrost Heater melts frost from the evaporator of the appliance throughout the automatic defrost cycle that occurs during normal operation. If the evaporator is freezing up and affecting the performance of the refrigerator, replacing the defrost heater may alleviate this issue. Remove the shelving and the rails in your freezer to gain access to the part behind the back panel. Installing this part will require basic hand tools, minor disassembly of the refrigerator and novice repair experience. Remember to unplug the refrigerator or shut off the house circuit breaker for the appliance before installing this part. Recommended Item: Consider replacing the Defrost Thermostat (item WP4387490) at the same time you complete this repair.
Part Specification
• This product is a Factory Certified Part. These three words represent quality parts and accessories designed specifically for your appliance. Time tested engineering that meets our strict quality specifications
• This product is a replacement part
• Package contains (1) SxS Refrigerator Defrost Heater
• Tools Needed: Multi screwdriver, wire splicing tool
Part Specification
• This product is a Factory Certified Part. These three words represent quality parts and accessories designed specifically for your appliance. Time tested engineering that meets our strict quality specifications
• This product is a replacement part
• Package contains (1) SxS Refrigerator Defrost Heater
• Tools Needed: Multi screwdriver, wire splicing tool
Weight : 5.87 lbs
Package Dimension : 31.44 x 11.19 x 2.32
The following parts are replaced by this product
- 2166031
- 2176942
- 2263749
1. Start by turning off the power supply to your Whirlpool WP2263749 Heater. You should do this at the breaker or fuse box.
2. Once the power has been turned off, locate the water supply line for the heater. Disconnect it from the heater by unscrewing the nut connecting it.
3. Next, remove the screws that attach the heater to the wall or floor.
4. Carefully lift the heater out of its place and set it aside. Then, remove any existing insulation around the heater.
5. Clean the area around the old heater before placing the new one. Make sure the area is free of dust and debris.
6. Place the new heater in the exact same location that the old one was previously installed.
7. Once the heater is secured in place, reconnect the water supply line to the heater by tightening the nut securely.
8. Turn the power back on at the breaker or fuse box.
9. Test the heater to make sure it works before you turn it off again.
10. Lastly, add insulation (if needed) around the new heater to ensure safety and improve efficiency.
Please keep in mind, these instructions are for general guidance and should always be used in conjunction with the manufacturer's manual, if available.


