Online Sale!
100% Guaranteed Genuine Parts
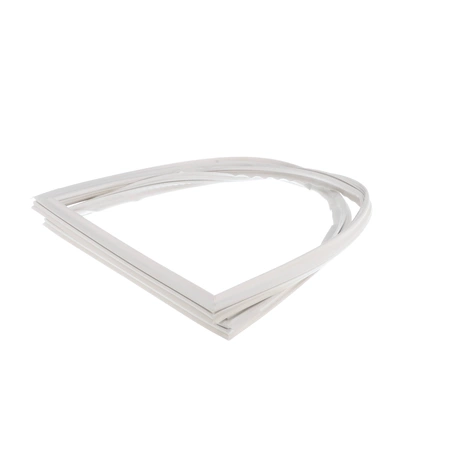
W11396037 Whirlpool Door Gasket
This Top Freezer Refrigerator Door Gasket is located on the inner door panel of the appliance’s fresh food compartment and creates a seal around the door. This gasket is white and designed to be used specifically with white appliances. If the refrigerator door doesn’t close properly or you can feel cold air escaping the appliance, replacing the rubber gasket may alleviate these issues. Note that door seal gaskets may also compress over time, causing the refrigerator to work harder to maintain a constant, cool temperature. To remove any creases or wrinkles from the new gasket, set it in the sun or place it in hot water for a few minutes. Installing this part will require basic hand tools, removal of the refrigerator’s door and novice repair experience. Make sure you unplug the appliance or shut off the house circuit breaker for the appliance before installing this part.
Part Specification
• This product is a Factory Certified Part. These three words represent quality parts and accessories designed specifically for your appliance. Time tested engineering that meets our strict quality specifications
• This product is a replacement part
• Package contains (1) Top Freezer Refrigerator Door Gasket
• Tools Needed: Multi screwdriver
Weight : 8.08 lbs
Package Dimension : 25.55 x 21.02 x 3.03
Compatible Brands


About this product
This Top Freezer Refrigerator Door Gasket is located on the inner door panel of the appliance’s fresh food compartment and creates a seal around the door. This gasket is white and designed to be used specifically with white appliances. If the refrigerator door doesn’t close properly or you can feel cold air escaping the appliance, replacing the rubber gasket may alleviate these issues. Note that door seal gaskets may also compress over time, causing the refrigerator to work harder to maintain a constant, cool temperature. To remove any creases or wrinkles from the new gasket, set it in the sun or place it in hot water for a few minutes. Installing this part will require basic hand tools, removal of the refrigerator’s door and novice repair experience. Make sure you unplug the appliance or shut off the house circuit breaker for the appliance before installing this part.
Part Specification
• This product is a Factory Certified Part. These three words represent quality parts and accessories designed specifically for your appliance. Time tested engineering that meets our strict quality specifications
• This product is a replacement part
• Package contains (1) Top Freezer Refrigerator Door Gasket
• Tools Needed: Multi screwdriver
Part Specification
• This product is a Factory Certified Part. These three words represent quality parts and accessories designed specifically for your appliance. Time tested engineering that meets our strict quality specifications
• This product is a replacement part
• Package contains (1) Top Freezer Refrigerator Door Gasket
• Tools Needed: Multi screwdriver
Weight : 8.08 lbs
Package Dimension : 25.55 x 21.02 x 3.03
The following parts are replaced by this product
- 67006302
- W10165979
- W10162893
- W10163896
- W10443236
- WPW10443236
- W10830057
DIY Instructions for Replacing a Whirlpool W11396037 GASKET-FIP
1. Before beginning, make sure your appliance is unplugged and the water is shut off to the unit.
2. Remove any screws or bolts that are holding the old gasket in place.
3. Carefully remove the old gasket. You may need to take a pair of pliers to help pull out stubborn parts or clips.
4. Inspect the new gasket for any damage or defects before installing.
5. Place the new gasket in the correct spot around the appliance. Start with one side and work onto the other.
6. Secure the gasket in place by using screws or bolts. Make sure these parts fit snugly and are tightened.
7. Turn on the power and water supply to the appliance, and test the seals on the gasket to ensure everything is properly fitted.
8. With the job finished, you can enjoy the peace of mind from having a properly functioning appliance.
Please keep in mind, these instructions are for general guidance and should always be used in conjunction with the manufacturer's manual, if available.


