100% Guaranteed Genuine Parts
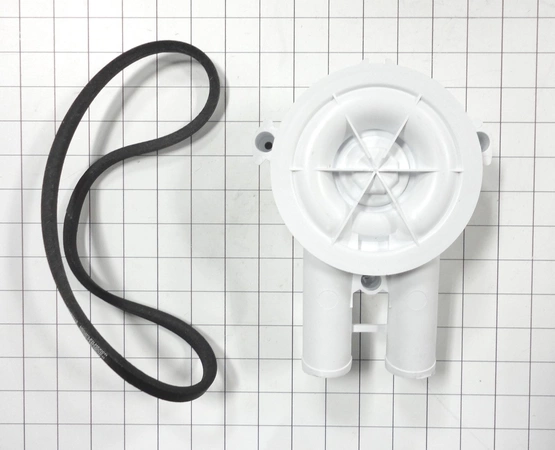
RB150003 Speed Queen Washer Pump Kit
Elevate your laundry efficiency with this high-quality pump kit designed specifically for optimal performance in Speed Queen washers. Engineered for durability, this replacement part ensures smooth operation, preventing leaks and extending the life of your appliance. Compatible with select models from Speed Queen, Amana, and Alliance, this pump is a versatile solution for your washing machine needs. The installation process is straightforward, making it easy for you to reinstate your washer's functionality without professional assistance. Trust in the reliability of this OEM part to deliver consistent water flow and maintain peak cleaning efficiency in your laundry routine. Keep your washer running like new with this essential pump kit.
Weight : 1.90 lbs
Package Dimension : 8.19 x 4.53 x 7.13
Compatible Brands


About this product
Elevate your laundry efficiency with this high-quality pump kit designed specifically for optimal performance in Speed Queen washers. Engineered for durability, this replacement part ensures smooth operation, preventing leaks and extending the life of your appliance. Compatible with select models from Speed Queen, Amana, and Alliance, this pump is a versatile solution for your washing machine needs. The installation process is straightforward, making it easy for you to reinstate your washer's functionality without professional assistance. Trust in the reliability of this OEM part to deliver consistent water flow and maintain peak cleaning efficiency in your laundry routine. Keep your washer running like new with this essential pump kit.
Weight : 1.90 lbs
Package Dimension : 8.19 x 4.53 x 7.13
Replacing the Speed Queen RB150003 Alliance Washer Pump Kit / Belt
Tools Needed: Philips screwdriver, flat head screwdriver, 8mm socket and ratchet, Vice grip pliers
Instructions:
1. Unplug the washer from the electrical socket.
2. Turn off the water supply to the washer and disconnect the hoses from the back of the machine.
3. Remove the back panel from the washer.
4. Use a Philips screwdriver to unscrew the four screws holding the pump in place.
5. Carefully remove the pump from the washer.
6. Use a 8mm socket and ratchet to remove the bolts that hold the belt in place.
7. Carefully remove the old belt from the machine.
8. Make sure to clean any built-up lint or dirt from the pulleys.
9. Install the new belt by positioning it around the pulleys and using the vice grip pliers to pull it into place.
10. Replace the bolts that hold the belt in place and tighten them until they are secure.
11. Place the new pump onto the washer and use the Philips screwdriver to secure it in place.
12. Reconnect the hoses and turn the water supply back on.
13. Plug the washer back into the electrical socket and test the machine to make sure it runs correctly.
Please keep in mind, these instructions are for general guidance and should always be used in conjunction with the manufacturer's manual, if available.


