Online Sale!
100% Guaranteed Genuine Parts
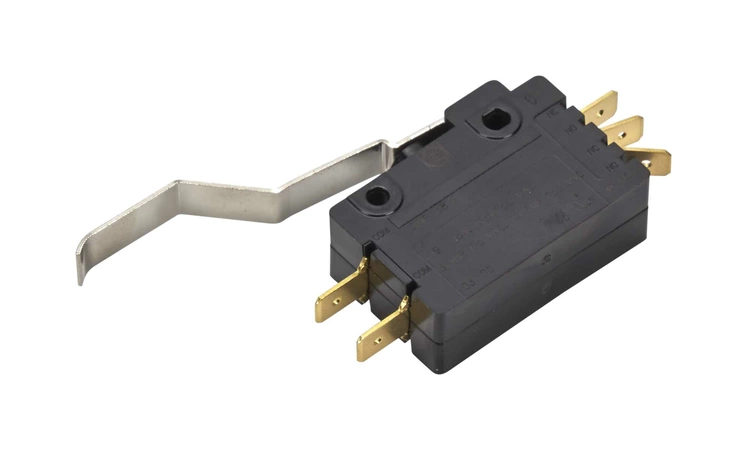
WP777811 Whirlpool Compactor Directional Switch
This Trash Compactor Directional Switch interrupts the flow of current to the motor when the compacting ram reaches the top of the compactor. If the motor won't stop in either the top or bottom position, replacing this part may alleviate the issue. Installing this part will require basic hand tools and some disassembly of the trash compactor. Previous repair experience will be helpful but is not necessary. You must unplug the compactor or shut off the house circuit breaker for the appliance before installing this part.
Part Specification
• This product is a Factory Certified Part. These three words represent quality parts and accessories designed specifically for your appliance. Time tested engineering that meets our strict quality specifications
• This product is a replacement part
• Package contains (1) Trash Compactor Directional Switch
• Tools Needed: Multi screwdriver and 1/4" open-ended wrench
Weight : 0.04 lbs
Package Dimension : 3.90 x 2.17 x 0.71
Compatible Brands


About this product
This Trash Compactor Directional Switch interrupts the flow of current to the motor when the compacting ram reaches the top of the compactor. If the motor won't stop in either the top or bottom position, replacing this part may alleviate the issue. Installing this part will require basic hand tools and some disassembly of the trash compactor. Previous repair experience will be helpful but is not necessary. You must unplug the compactor or shut off the house circuit breaker for the appliance before installing this part.
Part Specification
• This product is a Factory Certified Part. These three words represent quality parts and accessories designed specifically for your appliance. Time tested engineering that meets our strict quality specifications
• This product is a replacement part
• Package contains (1) Trash Compactor Directional Switch
• Tools Needed: Multi screwdriver and 1/4" open-ended wrench
Part Specification
• This product is a Factory Certified Part. These three words represent quality parts and accessories designed specifically for your appliance. Time tested engineering that meets our strict quality specifications
• This product is a replacement part
• Package contains (1) Trash Compactor Directional Switch
• Tools Needed: Multi screwdriver and 1/4" open-ended wrench
Weight : 0.04 lbs
Package Dimension : 3.90 x 2.17 x 0.71
The following parts are replaced by this product
- 749064
- 777811
- 4163405
- 41001106
Replacing the Whirlpool WP777811 SWITCH-DIR
DIY instructions
1. Prepare the necessary tools and materials. You will need a Phillips head screwdriver, a adjustable wrench, and the new switch.
2. Unplug the appliance from power source and make sure it is turned off.
3. Remove the screws located on the back of the appliance. Make sure to keep them away from the work area.
4. Carefully loosen the switch from its housing and disconnect the electrical wiring.
5. Install the new switch and reconnect the wires to the terminals.
6. Secure the switch in the appliance with the screws removed earlier.
7. Turn on the appliance and test the switch.
8. Restore power to the appliance and enjoy your newly replaced switch.
Please keep in mind, these instructions are for general guidance and should always be used in conjunction with the manufacturer's manual, if available.


