Online Sale!
100% Guaranteed Genuine Parts
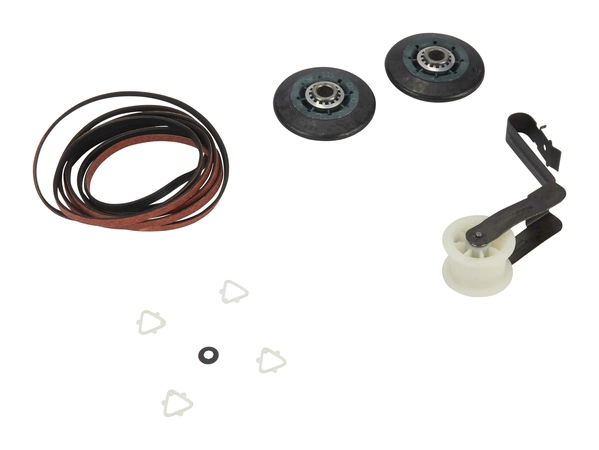
4392065 Whirlpool Dryer Maintenance Kit
The Dryer Repair Kit contains all the parts that are most commonly replaced when a dryer becomes noisy, the drum won’t spin or the dryer won’t start.The kit includes (2) drum rollers, (4) mounting clips, (1) idler pulley assembly and (1) drive belt. If your appliance isn't operating as expected, replacing this part may alleviate the issue. Replacing this part will require basic hand tools, some disassembly of the dryer and novice repair experience. You must unplug the dryer or shut off the house circuit breaker for the appliance before installing this part.
Part Specification
• This product is a Factory Certified Part. These three words represent quality parts and accessories designed specifically for your appliance. Time tested engineering that meets our strict quality specifications
• This product is a replacement part
• Package contains (1) Dryer Repair Kit
• Tools Needed: Multi screwdriver, putty knife
Weight : 8.42 lbs
Package Dimension : 9.75 x 9.38 x 12.75
Compatible Brands


About this product
The Dryer Repair Kit contains all the parts that are most commonly replaced when a dryer becomes noisy, the drum won’t spin or the dryer won’t start.The kit includes (2) drum rollers, (4) mounting clips, (1) idler pulley assembly and (1) drive belt. If your appliance isn't operating as expected, replacing this part may alleviate the issue. Replacing this part will require basic hand tools, some disassembly of the dryer and novice repair experience. You must unplug the dryer or shut off the house circuit breaker for the appliance before installing this part.
Part Specification
• This product is a Factory Certified Part. These three words represent quality parts and accessories designed specifically for your appliance. Time tested engineering that meets our strict quality specifications
• This product is a replacement part
• Package contains (1) Dryer Repair Kit
• Tools Needed: Multi screwdriver, putty knife
Part Specification
• This product is a Factory Certified Part. These three words represent quality parts and accessories designed specifically for your appliance. Time tested engineering that meets our strict quality specifications
• This product is a replacement part
• Package contains (1) Dryer Repair Kit
• Tools Needed: Multi screwdriver, putty knife
Weight : 8.42 lbs
Package Dimension : 9.75 x 9.38 x 12.75
The following parts are replaced by this product
- 279435
- 279708
- 691366K3
- 4392065RC
- DE2065
1. Unplug the Whirlpool dryer from its power source, and make sure that it's completely switched off.
2. Open the dryer door to access the internal components.
3. Find the maintenance kit inside the dryer. It is usually located on the left hand side, near the motor.
4. Remove the screws that are holding the old maintenance kit in place.
5. Carefully pull out the old maintenance kit and gently set it aside.
6. Take out the new maintenance kit and align it with the grooves of the old one.
7. Securely fasten the screws of the new maintenance kit.
8. Close the dryer door and plug it into the power source.
9. Switch on the dryer, and test it to make sure that it's working properly.
Please keep in mind, these instructions are for general guidance and should always be used in conjunction with the manufacturer's manual, if available.


