Online Sale!
100% Guaranteed Genuine Parts
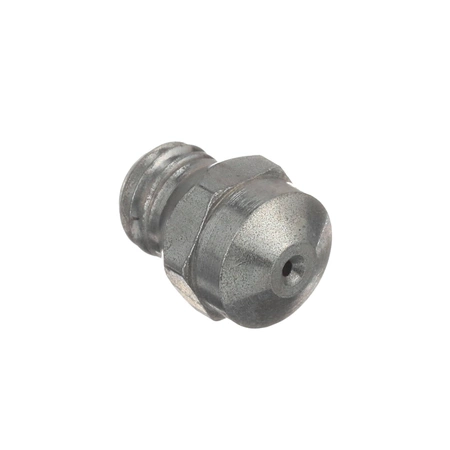
WB28K10376 GE Range Orifice
Maintain the functionality of your oven with this high-quality gas burner and control valve component, specifically designed for seamless compatibility with leading brands like GE, Hotpoint, Haier, Monogram, and Café. The expertly crafted part ensures optimal performance, making it an essential addition for maintaining your kitchen appliance.
Whether you’re fixing a malfunctioning burner or performing routine maintenance, this replacement part will help you restore your oven to peak efficiency. Engineered for durability and reliability, it meets the stringent standards set by GE, guaranteeing longevity and safety in your cooking endeavors. Maintain your oven with this reliable component to achieve perfect cooking results every time.
Weight : 0.35 lbs
Package Dimension : 5.43 x 4.61 x 1.93
Compatible Brands


About this product
Maintain the functionality of your oven with this high-quality gas burner and control valve component, specifically designed for seamless compatibility with leading brands like GE, Hotpoint, Haier, Monogram, and Café. The expertly crafted part ensures optimal performance, making it an essential addition for maintaining your kitchen appliance.
Whether you’re fixing a malfunctioning burner or performing routine maintenance, this replacement part will help you restore your oven to peak efficiency. Engineered for durability and reliability, it meets the stringent standards set by GE, guaranteeing longevity and safety in your cooking endeavors. Maintain your oven with this reliable component to achieve perfect cooking results every time.
Weight : 0.35 lbs
Package Dimension : 5.43 x 4.61 x 1.93
The following parts are replaced by this product
- WB28K8
- WB28K64
- WB28K0008
- WB28K0064
1. Begin by shutting off the gas supply to the range.
2. Disconnect the power supply and remove the bottom drawer on the range.
3. Locate the orifice spud, which is located behind the main burner assembly.
4. Unscrew the orifice spud using a wrench and remove it from the assembly.
5. Remove the new orifice spud from the packaging and insert it into the assembly, ensuring the threads are aligned correctly.
6. Secure the new orifice spud with the wrench.
7. Reconnect the power supply and replace the bottom drawer.
8. Turn the gas supply back on and check for any gas leaks.
Please keep in mind, these instructions are for general guidance and should always be used in conjunction with the manufacturer's manual, if available.
Please Verify Your Purchase to Submit a Review
Please note: We use this information only to confirm your purchase, it won’t be published.


