Online Sale!
100% Guaranteed Genuine Parts
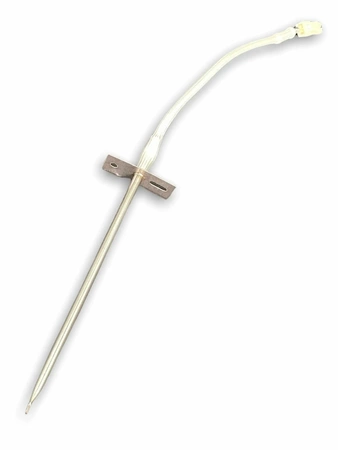
WB20K10015 GE Range Temperature Sensor
Ensure your oven operates at peak performance with this high-quality temperature sensor. Crafted by GE, this part is essential for accurate temperature readings, helping to eliminate the guesswork in your cooking process. Engineered for compatibility with a range of brands, including Hotpoint, Haier, Monogram, and Café, it's designed to fit seamlessly into your appliance.
Perfect for a variety of oven types, this sensor plays a crucial role in maintaining the correct cooking temperature, allowing you to achieve perfect results every time. If you’re looking to replace a faulty sensor or Maintain your oven's reliability, this durable, easy-to-install option is your solution. Keep your kitchen running efficiently and elevate your culinary skills with confidence.
Weight : 0.12 lbs
Package Dimension : 7.01 x 2.17 x 1.14
Compatible Brands


About this product
Ensure your oven operates at peak performance with this high-quality temperature sensor. Crafted by GE, this part is essential for accurate temperature readings, helping to eliminate the guesswork in your cooking process. Engineered for compatibility with a range of brands, including Hotpoint, Haier, Monogram, and Café, it's designed to fit seamlessly into your appliance.
Perfect for a variety of oven types, this sensor plays a crucial role in maintaining the correct cooking temperature, allowing you to achieve perfect results every time. If you’re looking to replace a faulty sensor or Maintain your oven's reliability, this durable, easy-to-install option is your solution. Keep your kitchen running efficiently and elevate your culinary skills with confidence.
Weight : 0.12 lbs
Package Dimension : 7.01 x 2.17 x 1.14
1. Unplug the refrigerator from the wall outlet to prevent any electrical shock.
2. Locate the temperature sensor or thermistor in the back of the refrigerator near the top.
3. Remove the bracket or insulation covering the temperature sensor.
4. Disconnect the wiring harness that connects to the temperature sensor by gently pulling it away.
5. Install the new GE WB20K10015 temperature sensor by connecting the wiring harness and securing it with the bracket or insulation.
6. Plug the refrigerator back into the wall outlet and turn it on.
7. Test the temperature sensor by setting the refrigerator control to different settings. Allow 24 hours for the refrigerator to cool down completely before adjusting the temperature setting further.
8. If the temperature does not cool properly, repeat the process and verify that the wiring is connected properly.
Please keep in mind, these instructions are for general guidance and should always be used in conjunction with the manufacturer's manual, if available.


