Online Sale!
100% Guaranteed Genuine Parts
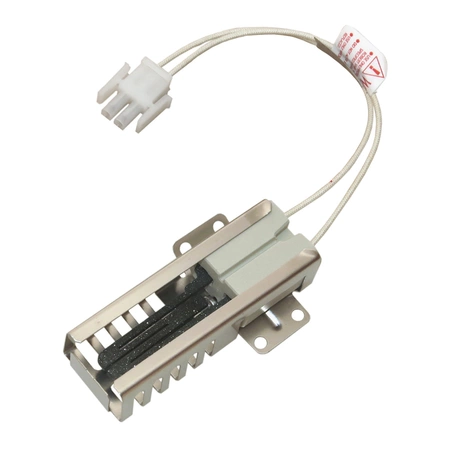
WB13K21 GE Oven Igniter with 7 Leads
WB13K21 is an original equipment manufactured (OEM) part. Enhance your oven's performance with this high-quality igniter, designed to replace worn or faulty units in GE, Hotpoint, Haier, Monogram, and Café appliances. Featuring seven leads, this component ensures a reliable ignition for a consistent cooking experience. Manufactured by GE, this igniter meets rigorous quality standards, offering durability and efficiency to your kitchen. Whether you're repairing an existing unit or performing routine maintenance, this part is essential for optimal oven functionality. Its straightforward installation process makes it accessible for both DIY enthusiasts and professional technicians. Invest in this key component to ensure your oven delivers exceptional results every time you cook.
Weight : 0.92 lbs
Package Dimension : 11.10 x 3.70 x 3.10
Compatible Brands


About this product
WB13K21 is an original equipment manufactured (OEM) part. Enhance your oven's performance with this high-quality igniter, designed to replace worn or faulty units in GE, Hotpoint, Haier, Monogram, and Café appliances. Featuring seven leads, this component ensures a reliable ignition for a consistent cooking experience. Manufactured by GE, this igniter meets rigorous quality standards, offering durability and efficiency to your kitchen. Whether you're repairing an existing unit or performing routine maintenance, this part is essential for optimal oven functionality. Its straightforward installation process makes it accessible for both DIY enthusiasts and professional technicians. Invest in this key component to ensure your oven delivers exceptional results every time you cook.
Weight : 0.92 lbs
Package Dimension : 11.10 x 3.70 x 3.10
The following parts are replaced by this product
- WB13K0012
- WB13K0014
- WB13K0013
- WB13K0021
Replacing the WB13K21 GE Oven Ignitor
1. Start by disconnecting the power to the oven by unplugging it. If your unit is hard-wired, turn off the breaker before conducting maintenance.
2. Remove the oven racks and anything else inside the oven.
3. Open the oven door and locate the ignitor near the bottom of the oven on the back wall.
4. Remove the screws that are holding the ignitor in place.
5. Take the ignitor out and inspect for damage or corrosion. If either is present, replace the ignitor.
6. To install the new ignitor, position it in the same place as the old one and secure it with the screws you removed.
7. Plug in the oven or switch the breaker back on.
8. Test the ignitor, setting the oven to broil and pressing the start button. The new ignitor should warm up and glow bright orange within a few minutes. If it doesn't, check the connections and try again.
9. Replace the oven racks and any other items you removed, and you're done.
Please keep in mind, these instructions are for general guidance and should always be used in conjunction with the manufacturer's manual, if available.


