Online Sale!
100% Guaranteed Genuine Parts
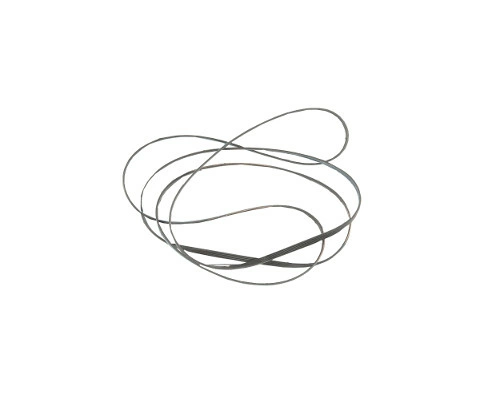
WPW10112954 Whirlpool Belt
The Dryer Drum Belt circles the dryer’s drum and attaches it to the motor pulley to create constant spinning during the drying cycle. If your dryer’s motor is running but the drum isn’t turning, the drum belt may be worn out or damaged and should be replaced. This part measures 92-1/2" L. Replacing this part will require basic hand tools, some disassembly of the dryer and novice repair experience. You must unplug the dryer or shut off the house circuit breaker for the appliance before installing this part.
Part Specification
• This product is a Factory Certified Part. These three words represent quality parts and accessories designed specifically for your appliance. Time tested engineering that meets our strict quality specifications
• This product is a replacement part
• Package contains (1) Dryer Drum Belt
• Tools Needed: Multi screwdriver, putty knife
Weight : 0.32 lbs
Package Dimension : 10.50 x 2.00 x 1.75
Compatible Brands


About this product
The Dryer Drum Belt circles the dryer’s drum and attaches it to the motor pulley to create constant spinning during the drying cycle. If your dryer’s motor is running but the drum isn’t turning, the drum belt may be worn out or damaged and should be replaced. This part measures 92-1/2" L. Replacing this part will require basic hand tools, some disassembly of the dryer and novice repair experience. You must unplug the dryer or shut off the house circuit breaker for the appliance before installing this part.
Part Specification
• This product is a Factory Certified Part. These three words represent quality parts and accessories designed specifically for your appliance. Time tested engineering that meets our strict quality specifications
• This product is a replacement part
• Package contains (1) Dryer Drum Belt
• Tools Needed: Multi screwdriver, putty knife
Part Specification
• This product is a Factory Certified Part. These three words represent quality parts and accessories designed specifically for your appliance. Time tested engineering that meets our strict quality specifications
• This product is a replacement part
• Package contains (1) Dryer Drum Belt
• Tools Needed: Multi screwdriver, putty knife
Weight : 0.32 lbs
Package Dimension : 10.50 x 2.00 x 1.75
The following parts are replaced by this product
- W10112954
Replacing the Whirlpool WPW10112954 BELT: Step-by-Step DIY Instructions
1. Unplug the Washer: Before beginning any repair project, make sure to unplug the washer from the electrical outlet.
2. Remove the Front Panel: Using a Phillips screwdriver, remove the screws located at the bottom corners of the washer’s front panel. Once the screws have been removed, you can then carefully lift the panel off the washer.
3. Inspect Old Belt and Remove if Necessary: Carefully inspect the existing belt to determine if it needs to be replaced. If the belt is broken or damaged, you will need to remove it. To do so, grab both ends of the belt and pull it off the motor pulleys.
4. Install the New Belt: Take hold of the new belt and position it around both of the motor pulleys. Make sure that the belt is not twisted before you proceed.
5. Place the Front Panel Back On: Once the new belt has been installed, place the front panel back onto the washer, making sure that all four screws are securely in place.
6. Plug in the Washer: You can now plug the washer back into the electrical outlet and turn it on. The repair is complete!
Please keep in mind, these instructions are for general guidance and should always be used in conjunction with the manufacturer's manual, if available.


