Online Sale!
100% Guaranteed Genuine Parts
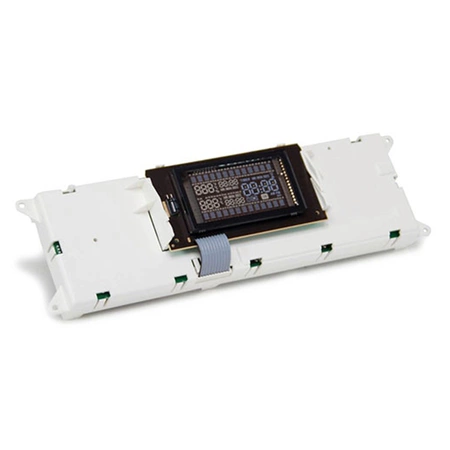
WP8507P234-60 Whirlpool Control Board
Whirlpool KitchenAid Roper Amana Jenn-Air Maytag Caloric Gaffers and Sattler Magic Chef Norge Sears Kenmore Admiral Range ERC Electronic Control Board Clock 8507P234-60
We are a Factory Authorized Parts Distributor for Whirlpool Maytag. Trust us for all of your Whirlpool Maytag appliance parts and accessories needs.
We are a Factory Authorized Parts Distributor for Whirlpool Maytag. Trust us for all of your Whirlpool Maytag appliance parts and accessories needs.
Weight : 3.21 lbs
Package Dimension : 14.72 x 5.00 x 6.06
Compatible Brands

About this product
Whirlpool KitchenAid Roper Amana Jenn-Air Maytag Caloric Gaffers and Sattler Magic Chef Norge Sears Kenmore Admiral Range ERC Electronic Control Board Clock 8507P234-60
We are a Factory Authorized Parts Distributor for Whirlpool Maytag. Trust us for all of your Whirlpool Maytag appliance parts and accessories needs.
We are a Factory Authorized Parts Distributor for Whirlpool Maytag. Trust us for all of your Whirlpool Maytag appliance parts and accessories needs.
Weight : 3.21 lbs
Package Dimension : 14.72 x 5.00 x 6.06
The following parts are replaced by this product
- 74011546
- 8507P234-60
- W10473900
DIY Guide to Replacing the WP8507P234-60 Whirlpool Control Board
Replacing the control board on a Whirlpool appliance can seem intimidating, but it doesn’t have to be. Here are simple instructions to help you make the swap like a pro.
Tools & Materials Needed:
– WP8507P234-60 Whirlpool Control Board
+ Screwdriver
Instructions:
1. First, unplug your appliance from the power source and shut off the water supply.
2. Remove the screws from the back panel to expose the wiring harnesses and connectors connected to the control board.
3. Gently pull the wiring harnesses and connectors away from the board to disconnect them.
4. Use a screwdriver to remove the remaining screws that secure the control board in place.
5. Carefully remove the old control board and discard it.
6. Put the new control board into place, making sure all of the pins align correctly with the holes.
7. Secure the board using the screws you previously removed.
8. Reconnect the wiring harnesses and connectors.
9. Reinstall the back panel and screws.
10. Plug in the appliance and turn on the water supply.
11. Test the appliance to make sure the control board replacement is functioning correctly.
Congratulations! You’ve successfully replaced the WP8507P234-60 Whirlpool Control Board.
Please keep in mind, these instructions are for general guidance and should always be used in conjunction with the manufacturer's manual, if available.


