Online Sale!
100% Guaranteed Genuine Parts
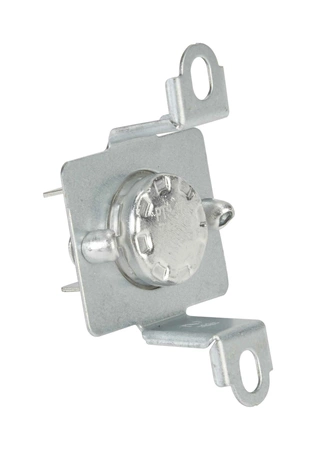
WP35001193 Whirlpool Thermal Fuse
The Dryer Thermal Fuse shuts off the burner in a gas dryer or the motor in an electric dryer when the appliance overheats. If he fuse is bad the dryer won't start or will run but no longer heat. Replacing it may alleviate these issues. Note that the thermal fuse cannot be reset. Fuses often blow due to a clogged dryer vent, so make sure you clean out this vent when installing the new part. The fuse is located on the blower housing in the rear of the dryer behind a small access panel. Replacing this part will require basic hand tools, some disassembly of the range and novice repair experience. You must unplug the range or shut off the house circuit breaker for the appliance before installing this part Also be sure to shut of the gas valve if applicable.
Part Specification
• This product is a Factory Certified Part. These three words represent quality parts and accessories designed specifically for your appliance. Time tested engineering that meets our strict quality specifications
• This product is a replacement part
• Package contains (1) Dryer Thermal Fuse
• Tools Needed: Multi screwdriver, pliers
Weight : 0.01 lbs
Package Dimension : 4.61 x 3.82 x 1.18
Compatible Brands


About this product
The Dryer Thermal Fuse shuts off the burner in a gas dryer or the motor in an electric dryer when the appliance overheats. If he fuse is bad the dryer won't start or will run but no longer heat. Replacing it may alleviate these issues. Note that the thermal fuse cannot be reset. Fuses often blow due to a clogged dryer vent, so make sure you clean out this vent when installing the new part. The fuse is located on the blower housing in the rear of the dryer behind a small access panel. Replacing this part will require basic hand tools, some disassembly of the range and novice repair experience. You must unplug the range or shut off the house circuit breaker for the appliance before installing this part Also be sure to shut of the gas valve if applicable.
Part Specification
• This product is a Factory Certified Part. These three words represent quality parts and accessories designed specifically for your appliance. Time tested engineering that meets our strict quality specifications
• This product is a replacement part
• Package contains (1) Dryer Thermal Fuse
• Tools Needed: Multi screwdriver, pliers
Part Specification
• This product is a Factory Certified Part. These three words represent quality parts and accessories designed specifically for your appliance. Time tested engineering that meets our strict quality specifications
• This product is a replacement part
• Package contains (1) Dryer Thermal Fuse
• Tools Needed: Multi screwdriver, pliers
Weight : 0.01 lbs
Package Dimension : 4.61 x 3.82 x 1.18
The following parts are replaced by this product
- 35001193
Step 1: Shut off the power to the dishwasher. Unplug the dishwasher's power cord from the electrical outlet.
Step 2: Remove the screws from the inside of the dishwasher door that are holding the bracket in place. Remove the bracket carefully, noting how it is situated so you can easily reinstall it.
Step 3: On the back of the new bracket, align the slots with the holes in the dishwasher door frame. Secure the bracket with the screws included.
Step 4: Plug the dishwasher’s power cord back into the electrical outlet and turn on the power. Test the dishwasher for proper operation.
Step 5: Once you’ve confirmed the bracket is securely affixed to the door and the dishwasher is functioning properly, replace the panel and any screws necessary to complete the job.
Please keep in mind, these instructions are for general guidance and should always be used in conjunction with the manufacturer's manual, if available.


