Online Sale!
100% Guaranteed Genuine Parts
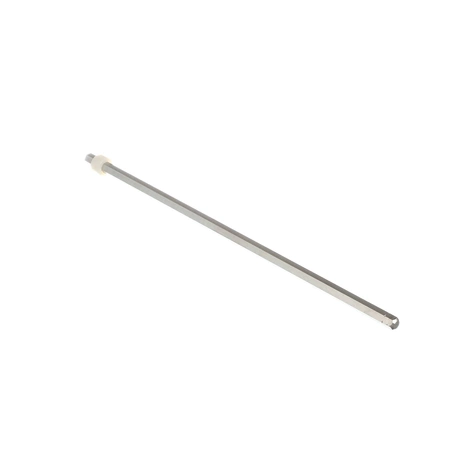
WP2318082 Whirlpool Ice Ejector Bar
Whirlpool WP2318082 SHAFT is We're your #1 source for genuine OEM appliance parts. Contact us for further questions as well as any other appliance parts needs!
Weight : 0.03 lbs
Package Dimension : 11.26 x 0.91 x 0.47
Compatible Brands


About this product
Whirlpool WP2318082 SHAFT is We're your #1 source for genuine OEM appliance parts. Contact us for further questions as well as any other appliance parts needs!
Weight : 0.03 lbs
Package Dimension : 11.26 x 0.91 x 0.47
The following parts are replaced by this product
- 2318030
- 2318082
DIY Instructions for Replacing the Whirlpool WP2318082 Shaft
Are you looking to replace the shaft on your Whirlpool WP2318082 washing machine? If so, you’ve come to the right place. Follow these simple steps and you’ll be able to easily swap out the old shaft for a new one in no time.
Step 1: Unplug the Washing Machine
Before you begin any repair or replacement work on a washing machine, make sure to unplug it from the wall to avoid any electrocution accidents. Now that the power is disconnected, it’s time to begin.
Step 2: Remove the Access Panel
Locate and remove the access panel on the front of the machine. This allows you to access the internal components of the washing machine.
Step 3: Disconnect the Shaft from the Motor
Once you have exposed the internal components, you will need to disconnect the shaft from the motor. There may be some screws that need to be removed to access the shaft.
Step 4: Remove the Old Shaft
Once the screws are removed, you can now begin to remove the old shaft. Carefully lift it out and set it aside.
Step 5: Install the New Shaft
Now that the old shaft has been removed, take the new shaft and carefully place it into the proper position.
Step 6: Secure the New Shaft
Once the new shaft is in position, use the proper screws to secure it in place. Make sure all screws are tight before you move on to the next step.
Step 7: Replace the Access Panel
Once the new shaft has been successfully secured in place, replace the access panel and make sure it’s tightly fastened in place.
Step 8: Plug in the Washing Machine
You’ve now successfully replaced the shaft on your Whirlpool WP2318082 washing machine. Time to plug it back in and give it a try!
By following the above steps, you can easily replace the shaft on your Whirlpool WP2318082 washing machine. Good luck, and get washing!
Please keep in mind, these instructions are for general guidance and should always be used in conjunction with the manufacturer's manual, if available.


