Online Sale!
100% Guaranteed Genuine Parts
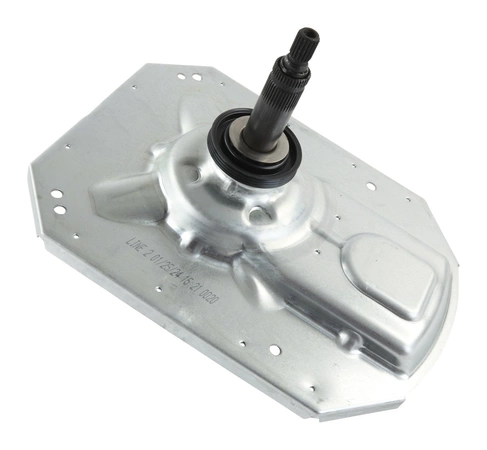
W11454734 Whirlpool Transmission
Whirlpool W11454734 GEARCASE We're your #1 source for genuine OEM appliance parts. Contact us for further questions as well as any other appliance parts needs!
Weight : 40.53 lbs
Package Dimension : 17.09 x 13.66 x 24.13
Compatible Brands


About this product
Whirlpool W11454734 GEARCASE We're your #1 source for genuine OEM appliance parts. Contact us for further questions as well as any other appliance parts needs!
Weight : 40.53 lbs
Package Dimension : 17.09 x 13.66 x 24.13
The following parts are replaced by this product
- W10006481
- W10771760
- W11035751
DIY Instructions for Replacing the Whirlpool W11454734 GEARCASE
Replacing the Whirlpool W11454734 gearcase is a straightforward and simple process that can be completed in just a few steps. With the right tools and guidance, you will be able to complete the task with ease. Follow this step-by-step guide to replace the gearcase on your Whirlpool appliance now.
Tools and Materials Needed:
• Replacement Whirlpool gearcase (W11454734)
• Phillip’s head screwdriver
• Flathead screwdriver
• Wrench
• Adjustable pliers
Step 1 - Unplug the Washer
Before you begin the repair process, make sure to unplug the washer from the wall outlet and turn off all of the water sources associated with the appliance. This will ensure your safety during the repair process and prevent any electrical or water damage.
Step 2 - Remove the Front Panel
Start by removing the front panel of the washer. To do this, locate the two screws located at the top corners of the panel and use the Phillip’s head screwdriver to remove them. Once the screws are removed, you can then lift off the front panel and set it aside.
Step 3 - Disconnect the Water Lines
Next, you will need to disconnect the water lines attached to the gearcase. Use the adjustable pliers to unscrew the water lines and safely remove them.
Step 4 - Remove the Gearcase
Once all of the water lines have been disconnected, you can then remove the gearcase. Start by locating the four screws holding the gearcase in place and use the wrench to loosen and remove them. Once all of the screws have been removed, you can pull the gearcase out of its housing.
Step 5 - Install the New Gearcase
Take the new gearcase and place it into the housing. Make sure it is seated securely and the screws are lined up with the holes. Use the wrench to tighten the screws back into place.
Step 6 - Reconnect the Water Lines
Once the gearcase is securely in place, use the adjustable pliers to reattach the water lines. Make sure the connections are snug and secure before turning the water sources back on.
Step 7 - Replace the Front Panel
Finally, replace the front panel of the washer. Place the panel back on the washer and use the Phillip’s head screwdriver to reattach the two screws.
That’s it! You have now successfully replaced the Whirlpool gearcase (W11454734).
Please keep in mind, these instructions are for general guidance and should always be used in conjunction with the manufacturer's manual, if available.


