Online Sale!
100% Guaranteed Genuine Parts
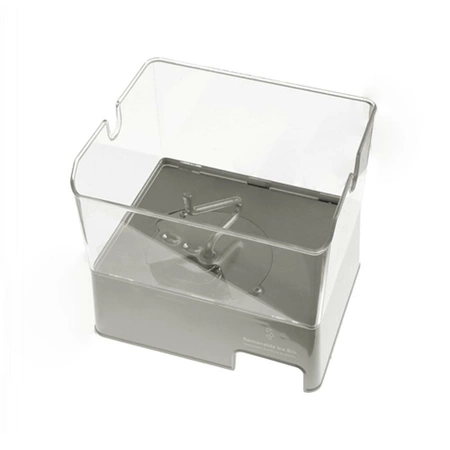
W11129522 Whirlpool Ice Bucket Assembly
Maintain your refrigerator's ice-making capabilities with this high-quality ice bucket assembly from Whirlpool, designed for optimal performance and durability. This essential component ensures your ice maker functions efficiently, providing you with a steady supply of ice for any occasion.
Designed to fit seamlessly with several popular brands, including Admiral, Amana, Jenn-Air, Kenmore, Kitchenaid, Magic Chef, Maytag, Norge, and Roper, this part is versatile and reliable. When replacing your ice bucket, you can trust that you're getting a product that meets the high standards of Whirlpool's renowned engineering.
Perfect for home or commercial use, this ice bucket assembly is a crucial part of maintaining your refrigerator's ice production system. Easy to install, it will have you back to enjoying cold beverages in no time. Don't compromise on quality—opt for a trusted name in appliance parts.
Weight : 8.52 lbs
Package Dimension : 9.76 x 9.45 x 12.83
Compatible Brands


About this product
Maintain your refrigerator's ice-making capabilities with this high-quality ice bucket assembly from Whirlpool, designed for optimal performance and durability. This essential component ensures your ice maker functions efficiently, providing you with a steady supply of ice for any occasion.
Designed to fit seamlessly with several popular brands, including Admiral, Amana, Jenn-Air, Kenmore, Kitchenaid, Magic Chef, Maytag, Norge, and Roper, this part is versatile and reliable. When replacing your ice bucket, you can trust that you're getting a product that meets the high standards of Whirlpool's renowned engineering.
Perfect for home or commercial use, this ice bucket assembly is a crucial part of maintaining your refrigerator's ice production system. Easy to install, it will have you back to enjoying cold beverages in no time. Don't compromise on quality—opt for a trusted name in appliance parts.
Weight : 8.52 lbs
Package Dimension : 9.76 x 9.45 x 12.83
The following parts are replaced by this product
- W10564750
How To Replace a Whirlpool W11129522 ICE-CONTNR-ASSY
Tools Needed:
• Phillips screwdriver
• Flat screwdriver
• Plastic pry tool
Instructions:
1. Unplug your refrigerator from its power source and remove any contents from the freezer.
2. Remove the two screws located on the top of the ice container assembly with a Phillips screwdriver.
3. Lift out the ice container assembly and place it face down on a flat surface.
4. Using a flat screwdriver or plastic pry tool, carefully remove the four clips that hold the ice maker’s wire harness in place.
5. Use the Phillips screwdriver to remove the two screws on the front panel of the ice maker.
6. Carefully remove the old ice maker assembly from the refrigerator.
7. Place your new ice maker assembly into the freezer. Make sure the two screws on the front panel of the ice maker are securely fastened.
8. Connect the four clips that hold the wire harness in place.
9. Insert the two screws on the top of the ice container assembly.
10. Plug in the refrigerator and turn on the power.
11. Enjoy your new Whirlpool W11129522 ICE-CONTNR-ASSY!
Please keep in mind, these instructions are for general guidance and should always be used in conjunction with the manufacturer's manual, if available.


