Online Sale!
100% Guaranteed Genuine Parts
W10887799 Whirlpool Trivet
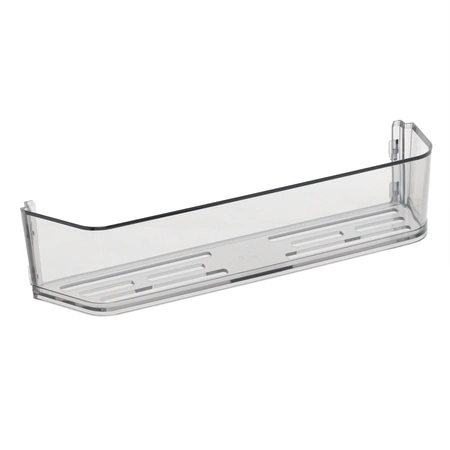
The SxS Refrigerator Door Shelf Bin is a plastic shelf that attaches to the inside of the refrigerator door. The door shelf bin is used to hold jars and bottles that would take up space in the main section of the refrigerator. Replacing this part will require no disassembly of the appliance or repair experience.
Part Specification
• This product is a Factory Certified Part. These three words represent quality parts and accessories designed specifically for your appliance. Time tested engineering that meets our strict quality specifications
• This product is a replacement part
• Package contains (1) SxS Refrigerator Door Shelf Bin
• No tools required for installation
Weight : 3.07 lbs
Package Dimension : 14.88 x 5.31 x 5.39
Compatible Brands


About this product
The SxS Refrigerator Door Shelf Bin is a plastic shelf that attaches to the inside of the refrigerator door. The door shelf bin is used to hold jars and bottles that would take up space in the main section of the refrigerator. Replacing this part will require no disassembly of the appliance or repair experience.
Part Specification
• This product is a Factory Certified Part. These three words represent quality parts and accessories designed specifically for your appliance. Time tested engineering that meets our strict quality specifications
• This product is a replacement part
• Package contains (1) SxS Refrigerator Door Shelf Bin
• No tools required for installation
Part Specification
• This product is a Factory Certified Part. These three words represent quality parts and accessories designed specifically for your appliance. Time tested engineering that meets our strict quality specifications
• This product is a replacement part
• Package contains (1) SxS Refrigerator Door Shelf Bin
• No tools required for installation
Weight : 3.07 lbs
Package Dimension : 14.88 x 5.31 x 5.39
Replacing a Whirlpool W10887799 Trivet
Step 1: Unplug the appliance from the electrical outlet and shut off the water supply.
Step 2: Open the dishwasher door and locate the trivet. Some models may have a lock mechanism that needs to be pressed in order to open the door.
Step 3: Remove the top rack of the dishwasher. This will provide access to the screws holding the trivet in place.
Step 4: Unscrew the screws and remove the trivet. If the screws are difficult to remove, use a wrench or pliers to loosen them.
Step 5: Clean the area around the trivet with a damp cloth. Make sure to remove any food particles or built-up deposits from the area.
Step 6: Place the new trivet in the same position as the old one. The holes should line up exactly with the existing ones.
Step 7: Secure the new trivet by tightening the screws with a screwdriver.
Step 8: Place the top rack back into the dishwasher.
Step 9: Reconnect the power and water supplies.
Step 10: Test the new trivet by running a cycle with a few dishes in it.
You have now successfully replaced your Whirlpool W10887799 Trivet!
Please keep in mind, these instructions are for general guidance and should always be used in conjunction with the manufacturer's manual, if available.


