Online Sale!
100% Guaranteed Genuine Parts
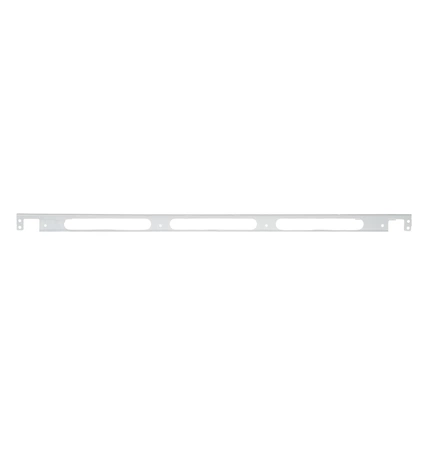
WB07K10250 GE Oven Door Trim Assembly Range Stove
Maintain the functionality of your oven with the Door Trim Assembly, designed to seamlessly integrate with various GE models. This high-quality replacement part ensures durability while providing a perfect fit for your appliance. Compatible with leading brands such as Hotpoint, Haier, Monogram, and Café, this trim assembly is essential for maintaining your oven's optimal performance and appearance. Crafted with precision, it protects the internal components and contributes to the overall efficiency of your cooking experience. Whether you’re replacing a worn-out trim or updating your kitchen aesthetic, this part is an ideal choice for homeowners seeking reliability and style. Maintain your appliance with this essential component today.
Weight : 3.14 lbs
Package Dimension : 32.00 x 3.90 x 3.50
Compatible Brands


About this product
Maintain the functionality of your oven with the Door Trim Assembly, designed to seamlessly integrate with various GE models. This high-quality replacement part ensures durability while providing a perfect fit for your appliance. Compatible with leading brands such as Hotpoint, Haier, Monogram, and Café, this trim assembly is essential for maintaining your oven's optimal performance and appearance. Crafted with precision, it protects the internal components and contributes to the overall efficiency of your cooking experience. Whether you’re replacing a worn-out trim or updating your kitchen aesthetic, this part is an ideal choice for homeowners seeking reliability and style. Maintain your appliance with this essential component today.
Weight : 3.14 lbs
Package Dimension : 32.00 x 3.90 x 3.50
The following parts are replaced by this product
- WB7K384
- WB07K0384
- WB07X7190
- WB07X7198
DIY Guide to Replacing the GE WB07K10250 Bottom Trim Assembly
Replacing the GE WB07K10250 bottom trim assembly can be a difficult task to do on your own. However, it is possible to complete the job yourself with the right tools and instructions. This guide will provide step-by-step instructions to help you replace the GE WB07K10250 bottom trim assembly.
Tools Needed:
• Screwdriver
• Putty knife
• Wire cutters
• Pliers
Step 1: Disconnect the power to the oven by unplugging the power cord from the wall.
Step 2: Use the putty knife to carefully pry off the plastic trim at the bottom of the oven. Once the trim is removed, use the screwdriver to unscrew the retaining screws along the sides of the oven.
Step 3: Cut the wires leading to the bottom trim assembly using the wire cutters. Use the pliers to pull off the old trim assembly.
Step 4: Install the new trim by attaching the wires to the new trim assembly. Secure the trim in place using the supplied screws and reattach the plastic trim along the bottom of the oven.
Step 5: Plug the power cord back into the wall outlet.
Once you have followed these steps, you can be confident that the GE WB07K10250 bottom trim assembly has been properly replaced. With just a few simple tools and this guide, you can successfully replace the GE WB07K10250 bottom trim assembly yourself.
Please keep in mind, these instructions are for general guidance and should always be used in conjunction with the manufacturer's manual, if available.


