Online Sale!
100% Guaranteed Genuine Parts
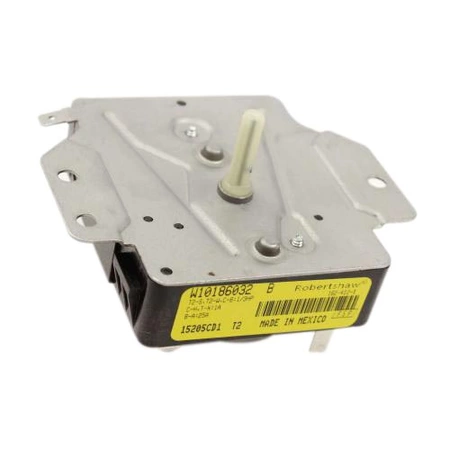
WPW10186032 Whirlpool Dryer Timer
WPW10186032 is an original equipment manufactured (OEM) part. Enhance your laundry experience with this reliable circuit board replacement designed specifically for your Whirlpool dryer. The timer ensures precise control over drying cycles, allowing your appliances to operate efficiently and effectively. This durable part is compatible with various brands, including Admiral, Amana, Jenn-Air, Kenmore, Kitchenaid, Magic Chef, Maytag, Norge, and Roper, making it a versatile choice for many households.
Engineered to meet OEM specifications, this timer offers seamless integration into your dryer system, ensuring optimal performance. Easy to install, it will help eliminate drying inconsistencies and restore your appliance to peak condition. Whether you’re a DIY enthusiast or a professional technician, this component will provide the reliability and functionality you need for your laundry routine. Maintain your dryer today and experience reliable, hassle-free drying.
Weight : 0.86 lbs
Package Dimension : 5.79 x 4.76 x 4.49
Compatible Brands

About this product
WPW10186032 is an original equipment manufactured (OEM) part. Enhance your laundry experience with this reliable circuit board replacement designed specifically for your Whirlpool dryer. The timer ensures precise control over drying cycles, allowing your appliances to operate efficiently and effectively. This durable part is compatible with various brands, including Admiral, Amana, Jenn-Air, Kenmore, Kitchenaid, Magic Chef, Maytag, Norge, and Roper, making it a versatile choice for many households.
Engineered to meet OEM specifications, this timer offers seamless integration into your dryer system, ensuring optimal performance. Easy to install, it will help eliminate drying inconsistencies and restore your appliance to peak condition. Whether you’re a DIY enthusiast or a professional technician, this component will provide the reliability and functionality you need for your laundry routine. Maintain your dryer today and experience reliable, hassle-free drying.
Weight : 0.86 lbs
Package Dimension : 5.79 x 4.76 x 4.49
The following parts are replaced by this product
- W10186032
No more associated models for this part.
How to Replace the Whirlpool WPW10186032 Timer
Replacing a Whirlpool WPW10186032 timer is an easy job that most people can do with basic knowledge of working with electrical components. With the right tools and a few simple steps, you can be done in no time. Here’s how to replace your Whirlpool WPW10186032 timer.
Materials Needed:
-Whirlpool WPW10186032 timer
-Screwdriver
-Needle-nose pliers
-Wire cutters
-Wire strippers (optional)
Step 1: Turn off the power to the appliance.
Step 2: Remove the existing timer from the appliance. Unscrew the mounting screws holding the timer in place with a screwdriver and remove it from the appliance.
Step 3: Disconnect the wires connected to the existing timer. Using needle-nose pliers, disconnect the wires from the terminals on the existing timer.
Step 4: Cut the wires. Use wire cutters to cut the wires leading from the appliance to the timer.
Step 5: Strip the wires. Using wire strippers, strip approximately one inch from the end of each wire.
Step 6: Connect the new timer. Insert the stripped wires into the appropriate terminals on the new timer and tighten the screws with a screwdriver.
Step 7: Mount the new timer. Place the new timer in the appliance and mount it with the screws that were removed in step 2.
Step 8: Turn the power back on. Flip the switch on the circuit breaker to restore power to the appliance.
And you’re done! Now you have a brand new Whirlpool WPW10186032 timer and your appliance is up and running.
Please keep in mind, these instructions are for general guidance and should always be used in conjunction with the manufacturer's manual, if available.


