Online Sale!
100% Guaranteed Genuine Parts
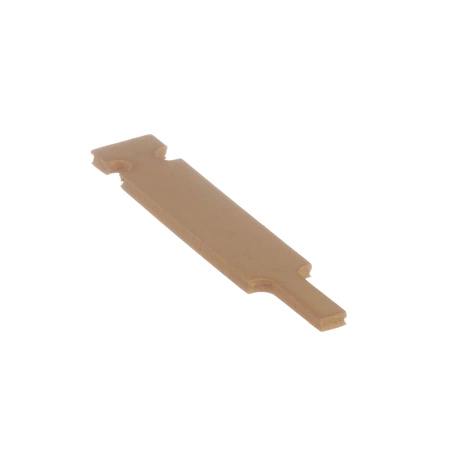
WP37001298 Whirlpool Drum Slide Glide or Pad
The Dryer Drum Glide supports the front of the drum as it spins during the drying cycle. If you’re hearing a scraping or grinding sound coming from the front of your appliance during operation, one or more of the drum glides may need to be replaced: Note that you must replace all the glides at the same time, even if the others are not causing an issue. Installing this part will require basic hand tools, some disassembly of the dryer and novice repair experience.
Part Specification
• This product is a Factory Certified Part. These three words represent quality parts and accessories designed specifically for your appliance. Time tested engineering that meets our strict quality specifications
• This product is a replacement part
• Package contains (1) Dryer Drum Glide
• Tools Needed: Multi screwdriver
Weight : 0.030000 lbs
Dimension : 3.700700 x 1.102300 x 1.023600
Compatible Brands


About this product
The Dryer Drum Glide supports the front of the drum as it spins during the drying cycle. If you’re hearing a scraping or grinding sound coming from the front of your appliance during operation, one or more of the drum glides may need to be replaced: Note that you must replace all the glides at the same time, even if the others are not causing an issue. Installing this part will require basic hand tools, some disassembly of the dryer and novice repair experience.
Part Specification
• This product is a Factory Certified Part. These three words represent quality parts and accessories designed specifically for your appliance. Time tested engineering that meets our strict quality specifications
• This product is a replacement part
• Package contains (1) Dryer Drum Glide
• Tools Needed: Multi screwdriver
Part Specification
• This product is a Factory Certified Part. These three words represent quality parts and accessories designed specifically for your appliance. Time tested engineering that meets our strict quality specifications
• This product is a replacement part
• Package contains (1) Dryer Drum Glide
• Tools Needed: Multi screwdriver
Weight : 0.030000 lbs
Dimension : 3.700700 x 1.102300 x 1.023600
The following parts are replaced by this product
- 501676
- 40116502
- 40116501
- 37001298
- 37001298
No more associated models for this part.
1. Start by unplugging the WP37001298 Whirlpool dryer from the wall outlet and making sure the appliance is off and cool to the touch.
2. Remove the front cover by lifting off the top first and then completely removing the bottom of the front cover.
3. Locate the drum glide in the top right corner of the dryer. It is a long, thin piece of plastic that runs along the side of the drum.
4. Remove the old drum glide by unscrewing the two screws holding it in place.
5. Take the new drum glide and align the holes in the new part with the two screws removed earlier.
6. Secure the new drum glide in place using the two screws removed earlier.
7. Replace the front cover by reversing the removal process and making sure the top of the front cover is secured in place first.
8. Plug in the appliance and begin testing the dryer’s functionality.
Please keep in mind, these instructions are for general guidance and should always be used in conjunction with the manufacturer's manual, if available.
Write Your Own Review


