Online Sale!
100% Guaranteed Genuine Parts
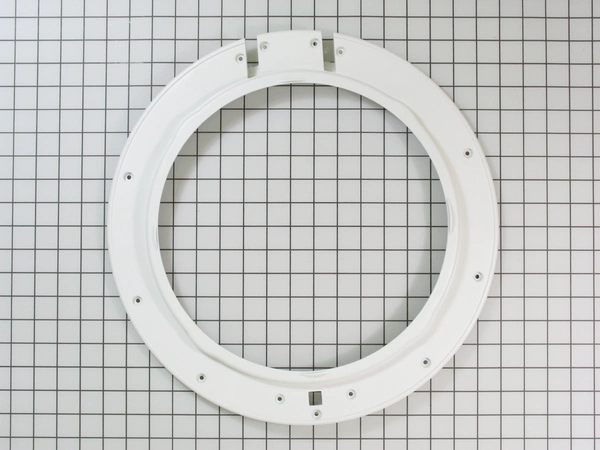
WP34001179 Whirlpool Door Frame
Maintain your appliance with this high-quality door frame, designed specifically for Whirlpool washers and compatible with various popular brands, including Admiral, Amana, Jenn-Air, Kenmore, Kitchenaid, Magic Chef, Maytag, Norge, and Roper. This essential component ensures a secure and reliable fit, enhancing the efficiency and longevity of your washing machine. Made from durable materials, it withstands the rigors of daily use while providing a seamless installation process. Whether you’re replacing a worn or damaged part, this door frame is a practical choice for maintaining optimal appliance performance. Ensure that your washer operates smoothly and efficiently with this dependable door frame. Ideal for both DIY repairs and professional servicing.
Weight : 2.08 lbs
Dimension : 16.70 x 16.70 x 1.00
Compatible Brands

About this product
Maintain your appliance with this high-quality door frame, designed specifically for Whirlpool washers and compatible with various popular brands, including Admiral, Amana, Jenn-Air, Kenmore, Kitchenaid, Magic Chef, Maytag, Norge, and Roper. This essential component ensures a secure and reliable fit, enhancing the efficiency and longevity of your washing machine. Made from durable materials, it withstands the rigors of daily use while providing a seamless installation process. Whether you’re replacing a worn or damaged part, this door frame is a practical choice for maintaining optimal appliance performance. Ensure that your washer operates smoothly and efficiently with this dependable door frame. Ideal for both DIY repairs and professional servicing.
Weight : 2.08 lbs
Dimension : 16.70 x 16.70 x 1.00
The following parts are replaced by this product
- 34001179
Replacing the Whirlpool WP34001179 Holder-Gla
DIY Instructions
1. Unplug the dishwasher before beginning.
2. Remove the screws that hold the hinge cover, use a screwdriver to undo the screws.
3. Put your hand inside the dishwasher and locate the holder-gla. Use your fingers to feel for it.
4. Once you have located the holder-gla, pull it forward slightly to disconnect it from the dishwasher.
5. Pull the holder-gla completely out of the dishwasher and set it aside.
6. Take the new holder-gla and slide it into place on the dishwasher, aligning the slots with the mounting holes.
7. Push the holder-gla firmly into place.
8. Secure the holder-gla using the screws removed in step 2.
9. Reconnect any wiring associated with the holder-gla.
10. Plug the dishwasher back in, turn it back on and test to make sure it is working correctly.
Finding and replacing the Whirlpool WP34001179 Holder-Gla is a fairly straightforward process. By following these steps you can quickly and easily replace the holder-gla and get your dishwasher back up and running in no time.
Please keep in mind, these instructions are for general guidance and should always be used in conjunction with the manufacturer's manual, if available.
Write Your Own Review


