Online Sale!
100% Guaranteed Genuine Parts
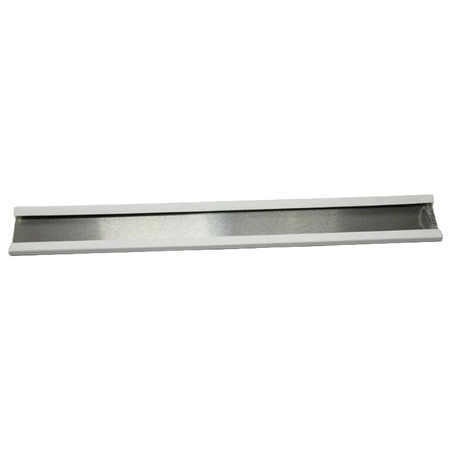
WP2256010 Whirlpool Door Shelf Trim
Maintain your refrigerator with the WP2256010 door shelf trim, a vital component designed for both functionality and durability. This high-quality shelf trim is compatible with multiple leading brands, including Whirlpool, Amana, and Maytag, ensuring a perfect fit for your appliance. Engineered to support various shelf configurations, it enhances storage capacity while maintaining a sleek appearance.
Installing this reliable part is straightforward, allowing you to restore your refrigerator's organization quickly. Made from robust materials, this door shelf trim guarantees longevity and performance you can trust. Say goodbye to cluttered shelves and welcome a more efficient organization in your refrigerator. Perfect for replacements or upgrades, this trim is essential for any household looking to improve their kitchen storage solutions.
Weight : 0.215800 lbs
Dimension : 14.750000 x 1.750000 x 0.250000
Compatible Brands


About this product
Maintain your refrigerator with the WP2256010 door shelf trim, a vital component designed for both functionality and durability. This high-quality shelf trim is compatible with multiple leading brands, including Whirlpool, Amana, and Maytag, ensuring a perfect fit for your appliance. Engineered to support various shelf configurations, it enhances storage capacity while maintaining a sleek appearance.
Installing this reliable part is straightforward, allowing you to restore your refrigerator's organization quickly. Made from robust materials, this door shelf trim guarantees longevity and performance you can trust. Say goodbye to cluttered shelves and welcome a more efficient organization in your refrigerator. Perfect for replacements or upgrades, this trim is essential for any household looking to improve their kitchen storage solutions.
Weight : 0.215800 lbs
Dimension : 14.750000 x 1.750000 x 0.250000
The following parts are replaced by this product
- 2256010
- 2182190
- 2198488
- 2182188
No more associated models for this part.
Step 1: Prepare for the Project
1. Unplug the refrigerator from the wall and remove all food items from the door shelf. You may need to remove some shelves to make space.
2. Gather all the necessary tools and supplies, such as a Phillips head screwdriver, pliers, and a new WP2256010 Whirlpool Door Shelf Trim.
Step 2: Remove the Old Trim
1. Using your Phillips head screwdriver, unscrew the screws that hold the old trim in place.
2. Carefully remove the old trim and disposal of it according to local regulations.
Step 3: Install the New Trim
1. Place the new trim in the same area where you removed the old trim.
2. Secure the trim with the screws that were used to hold the old trim in place.
3. Tighten the screws evenly until everything is secure.
Step 4: Clean Up
1. Inspect the new trim for any defects or damage.
2. Wipe away any debris that may have been created in the process.
Step 5: Test and Enjoy
1. Plug in the fridge and test out the new trim.
2. If everything looks and works correctly, then you are done. Enjoy the convenience of having the updated trim!
Please keep in mind, these instructions are for general guidance and should always be used in conjunction with the manufacturer's manual, if available.
Write Your Own Review


