Online Sale!
100% Guaranteed Genuine Parts
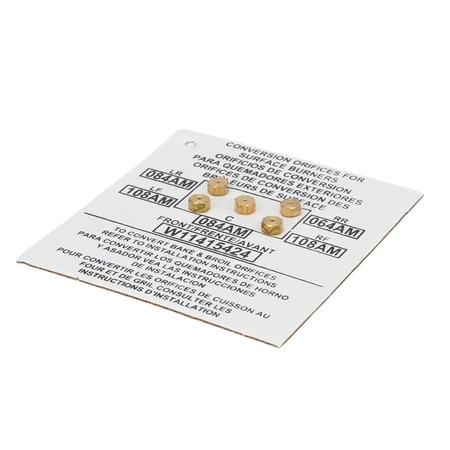
W11453918 Whirlpool Gas Range Conversion Kit
The W11453918 conversion kit is essential for transforming your gas range for optimal performance and safety. Designed specifically for Whirlpool and compatible with numerous brands, including Admiral, Amana, Jenn-Air, and more, this kit ensures a seamless transition to alternative gas types. Featuring high-quality gas burner and control valve components, it allows for precise control and efficient fuel consumption. This replacement part is not only easy to install but also enhances the reliability of your appliance. Whether you’re a seasoned chef or a home cook, this kit is an invaluable addition to your kitchen equipment. Ensure compatibility and Maintain your cooking experience today with this reliable solution for your range.
Weight : 0.04 lbs
Package Dimension : 4.49 x 4.37 x 0.31
Compatible Brands


About this product
The W11453918 conversion kit is essential for transforming your gas range for optimal performance and safety. Designed specifically for Whirlpool and compatible with numerous brands, including Admiral, Amana, Jenn-Air, and more, this kit ensures a seamless transition to alternative gas types. Featuring high-quality gas burner and control valve components, it allows for precise control and efficient fuel consumption. This replacement part is not only easy to install but also enhances the reliability of your appliance. Whether you’re a seasoned chef or a home cook, this kit is an invaluable addition to your kitchen equipment. Ensure compatibility and Maintain your cooking experience today with this reliable solution for your range.
Weight : 0.04 lbs
Package Dimension : 4.49 x 4.37 x 0.31
Step 1: Unplug the Refrigerator
Before beginning any repairs to the refrigerator, unplug the power cord from the wall outlet. This will ensure that the power is disconnected and you don't experience any electric shock or injury.
Step 2: Remove the Door
To replace the Whirlpool W11453918 SPUD-ORFCE, remove the door of the refrigerator. Open the door, then use a screwdriver to loosen and remove the screws on each side of the door. Pull the door away from the unit, being careful not to damage the hinges.
Step 3: Locate the Defective Part
Once the door is removed, locate the defective part. The Whirlpool W11453918 SPUD-ORFCE is the piece that connects the water line to the back wall of the refrigerator. It should be easy to identify, as it's generally silver in color and has a circular shape.
Step 4: Remove the Old Part
Remove the old part by unscrewing it from the back wall. Use an adjustable wrench or a pair of pliers to get a good grip. Gently pull the part out of it's slot and set it aside.
Step 5: Install the New Part
Obtain the replacement part, which should have come with instructions for installation. Insert the new part into the slot on the back wall of the refrigerator and secure it in place using the screws provided.
Step 6: Reattach the Door
To complete your repair, reattach the door to the refrigerator. Make sure that all of the screws are in place and then close the door. Plug the power cord back into the wall outlet and you're done!
Please keep in mind, these instructions are for general guidance and should always be used in conjunction with the manufacturer's manual, if available.


