Online Sale!
100% Guaranteed Genuine Parts
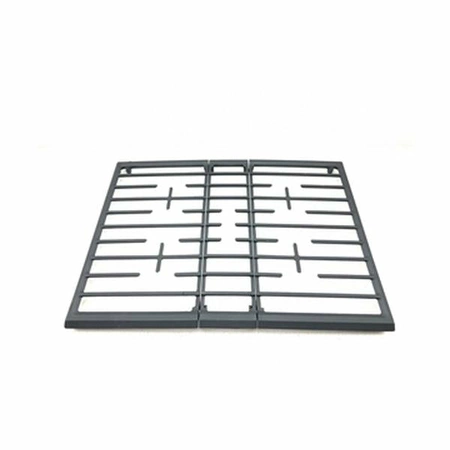
W11252165 Whirlpool Burner Grate
Maintain the functionality of your cooking space with this durable burner grate and griddle, expertly designed to withstand the demands of daily cooking. Ideal for a variety of ranges, this essential component is compatible with respected brands such as Admiral, Amana, Jenn-Air, Kenmore, Kitchenaid, Magic Chef, Maytag, Norge, Roper, and Whirlpool. Crafted with precision, it ensures even heat distribution for perfectly cooked meals every time. This part not only provides stability for your pots and pans but also features an easy-to-clean surface, simplifying your kitchen maintenance. Maintain your range with this reliable replacement, ensuring your appliance performs at its best for years to come.
Weight : 11.96 lbs
Package Dimension : 23.07 x 16.81 x 3.46
Compatible Brands

About this product
Maintain the functionality of your cooking space with this durable burner grate and griddle, expertly designed to withstand the demands of daily cooking. Ideal for a variety of ranges, this essential component is compatible with respected brands such as Admiral, Amana, Jenn-Air, Kenmore, Kitchenaid, Magic Chef, Maytag, Norge, Roper, and Whirlpool. Crafted with precision, it ensures even heat distribution for perfectly cooked meals every time. This part not only provides stability for your pots and pans but also features an easy-to-clean surface, simplifying your kitchen maintenance. Maintain your range with this reliable replacement, ensuring your appliance performs at its best for years to come.
Weight : 11.96 lbs
Package Dimension : 23.07 x 16.81 x 3.46
The following parts are replaced by this product
- W11159640
DIY Instructions on Replacing a Whirlpool W11252165 GRATE-KIT
Step 1: Gather the necessary tools and parts. You will need a Phillips head screwdriver, a putty knife, a pair of needle nose pliers, the Whirlpool W11252165 GRATE-KIT, and a rag.
Step 2: Unscrew the two screws located on either side of the old grate-kit. Using the Phillips head screwdriver, carefully remove the screws and set them aside.
Step 3: Insert the tip of the putty knife under the old grate-kit and gently pry it off.
Step 4: Remove the four metal clips that secure the old grate-kit in place by using the needle nose pliers.
Step 5: Clean the surface where the old grate-kit was attached using the rag.
Step 6: Line up the new grate-kit and press it into place.
Step 7: Reattach the four metal clips to secure the new grate-kit.
Step 8: Replace the two screws that were removed earlier. Tighten the screws to make sure the grate-kit is secured in place.
Step 9: Test the new grate-kit to make sure it's properly installed.
You have now successfully replaced your Whirlpool W11252165 GRATE-KIT.
Please keep in mind, these instructions are for general guidance and should always be used in conjunction with the manufacturer's manual, if available.


