Online Sale!
100% Guaranteed Genuine Parts
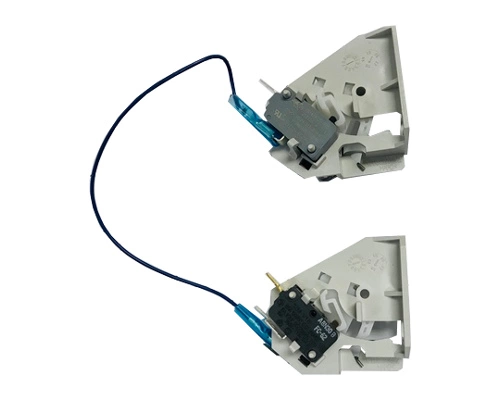
W11244490 Whirlpool Door Switch
Whirlpool W11244490 interlock switchWe're your #1 source for genuine OEM appliance parts. Contact us for further questions as well as any other appliance parts needs!
Weight : 0.40 lbs
Package Dimension : 7.00 x 4.25 x 2.25
Compatible Brands


About this product
Whirlpool W11244490 interlock switchWe're your #1 source for genuine OEM appliance parts. Contact us for further questions as well as any other appliance parts needs!
Weight : 0.40 lbs
Package Dimension : 7.00 x 4.25 x 2.25
No more associated models for this part.
Step 1: Turn off the power to the dryer and unplug the appliance.
Step 2: Unscrew the back panel of the dryer using a Phillips head screwdriver.
Step 3: Once the panel is off, locate the Whirlpool W11244490 Interlock Switch.
Step 4: Gently remove the switch from its housing, being careful not to pull or tug on any wires connected to it.
Step 5: Take your new Whirlpool W11244490 Interlock Switch, and place it in the same spot as the old one.
Step 6: Reconnect the wires from the old Interlock Switch to the new one.
Step 7: Put the back panel back on, and re-secure it with the screws.
Step 8: Plug the dryer back into the wall outlet and turn the power back on.
Step 9: Test the dryer to ensure that the Interlock Switch is working properly.
Step 10: Enjoy the peace of mind knowing that your dryer is now functioning safely and properly!
Please keep in mind, these instructions are for general guidance and should always be used in conjunction with the manufacturer's manual, if available.


