Online Sale!
100% Guaranteed Genuine Parts
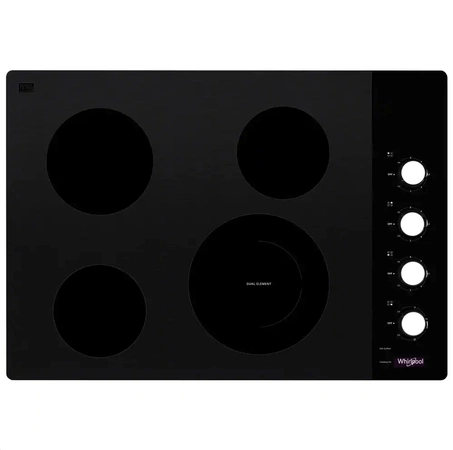
W11223301 Whirlpool Glass Main Top
W11223301 Whirlpool Glass Maintop Assembly is a genuine OEM (Original Equipment Manufacturer) part from Whirlpool. It maintains the functionality and aesthetics of your cooktop and replaces the previous part number W11120971. Refer to your Owner’s Manual for proper installation instructions to ensure the cooktop operates safely and efficiently, maintaining a stable surface for your cookware.
Weight : 57.55 lbs
Package Dimension : 39.50 x 30.00 x 6.75
Compatible Brands

About this product
W11223301 Whirlpool Glass Maintop Assembly is a genuine OEM (Original Equipment Manufacturer) part from Whirlpool. It maintains the functionality and aesthetics of your cooktop and replaces the previous part number W11120971. Refer to your Owner’s Manual for proper installation instructions to ensure the cooktop operates safely and efficiently, maintaining a stable surface for your cookware.
Weight : 57.55 lbs
Package Dimension : 39.50 x 30.00 x 6.75
DIY Instructions: How to Replace a Whirlpool W11223301 Cooktop
Before starting the installation, make sure you have all the parts and tools necessary for the job. You will need a new Whirlpool W11223301 cooktop, Phillips or flathead screwdrivers, an appropriately sized socket wrench, and any replacement parts (gaskets, screws, etc.) that may come with the cooktop.
Step 1: Disconnect the Power. Before beginning any installation, always switch off the circuit breaker for the area where you are working.
Step 2: Unplug the Existing Cooktop. Locate the gas supply hose, electric cord, and water line running beneath the existing cook top. Unscrew them from the work surface and attach caps to the open ends.
Step 3: Remove Existing Cooktop. Use either a flathead screwdriver or Phillips head screwdriver to remove any bolts securing the cooktop to the work surface. Once the bolts are out, carefully lift the cooktop up and out of its space.
Step 4: Clean the Work Surface. Using a soft cloth and mild dish soap, clean the surface of the worktop so that it is free of dirt and dust. Inspect the underside of the cooktop to ensure no bits of the old cooktop are left behind.
Step 5: Install the New Cooktop. Place the new cooktop on the work surface and ensure that it is level. Note: The edges of the cooktop should be flush with the countertop.
Step 6: Secure the Cooktop. Use the included screws to secure the cooktop to the work surface. Make sure the screws are tightened securely.
Step 7: Reattach the Gas, Electric, and Water Lines. Connect the gas supply hose, electric cord, and water line to the underside of the cooktop. Hand tighten the connections.
Step 8: Test the Cooktop. Plug in the electric cord and turn on the circuit breaker. Turn on the cooktop and let it run for a few minutes to ensure it is working correctly. After testing, turn off the cooktop and switch off the circuit breaker.
You have now successfully replaced your Whirlpool W11223301 cooktop!
Please keep in mind, these instructions are for general guidance and should always be used in conjunction with the manufacturer's manual, if available.


