Online Sale!
100% Guaranteed Genuine Parts
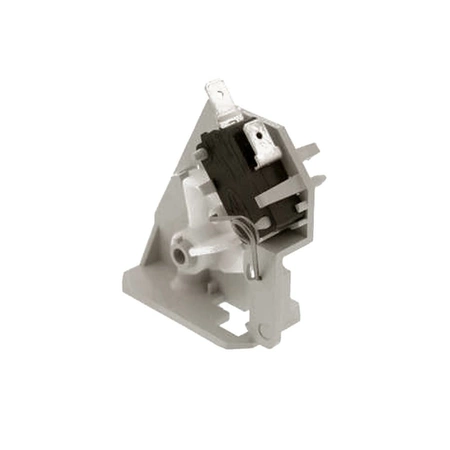
W11192679 Whirlpool Interlock Switch
Ensure your microwave functions optimally with this essential interlock switch, designed specifically for various Whirlpool models. This reliable part is compatible with several well-known brands, including Admiral, Amana, Jenn-Air, Kenmore, Kitchenaid, Magic Chef, Maytag, Norge, and Roper. Easy to install, it helps maintain safety and efficiency by ensuring the microwave operates only when the door is securely closed. With a focus on durability and performance, this switch is built to meet rigorous standards and provide long-lasting service. Whether you're a DIY enthusiast or a professional technician, having this switch on hand will ensure smooth operations in your kitchen appliance. Maintain your microwave’s functionality today!
Weight : 0.40 lbs
Package Dimension : 7.00 x 4.25 x 2.37
Compatible Brands


About this product
Ensure your microwave functions optimally with this essential interlock switch, designed specifically for various Whirlpool models. This reliable part is compatible with several well-known brands, including Admiral, Amana, Jenn-Air, Kenmore, Kitchenaid, Magic Chef, Maytag, Norge, and Roper. Easy to install, it helps maintain safety and efficiency by ensuring the microwave operates only when the door is securely closed. With a focus on durability and performance, this switch is built to meet rigorous standards and provide long-lasting service. Whether you're a DIY enthusiast or a professional technician, having this switch on hand will ensure smooth operations in your kitchen appliance. Maintain your microwave’s functionality today!
Weight : 0.40 lbs
Package Dimension : 7.00 x 4.25 x 2.37
1. Gather Your Tools: To replace the Whirlpool W11192679 INTERLOCK KIT, you’ll need a flathead screwdriver and a medium Phillips head screwdriver.
2. Prepare the Dryer: To access the INTERLOCK KIT, the dryer will need to be moved away from the wall. Shut off the power to the dryer by unplugging it or turning off the breakers in the electrical panel. Next, use a flathead screwdriver to loosen and remove the two screws located on the bottom rear of the dryer.
3. Remove Existing INTERLOCK KIT: Once the dryer is clear of the wall, gently pull open the top console. With a medium Phillips head screwdriver, unscrew and remove the three screws that secure the existing INTERLOCK KIT. Carefully remove the INTERLOCK KIT and set aside.
4. Install the New INTERLOCK KIT: Take the new INTERLOCK KIT and insert it into place. Secure the INTERLOCK KIT with the three screws. Tighten the screws securely, but do not overtighten them.
5. Reassemble the Dryer: Close the top console and reinstall the two screws along the bottom rear of the dryer. Finally, plug the dryer back in or turn the breakers back on in the electrical panel.
6. Test the Dryer: Before using the dryer, make sure all connections are secure and the power is on. Perform a test run to confirm that the new INTERLOCK KIT is working properly.
Please keep in mind, these instructions are for general guidance and should always be used in conjunction with the manufacturer's manual, if available.


