Online Sale!
100% Guaranteed Genuine Parts
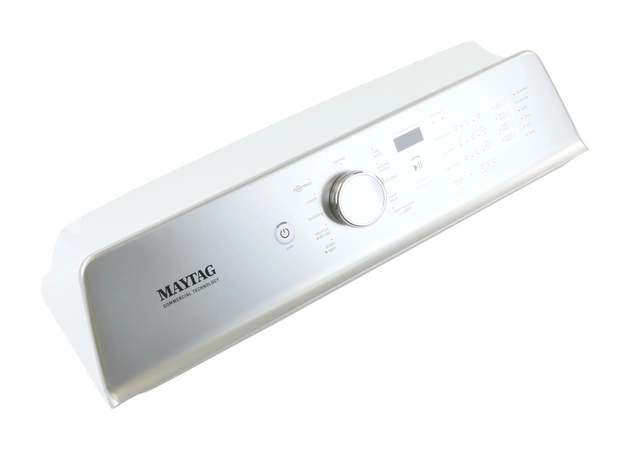
W11135391 Whirlpool Washer Control Console
Control console works with some Whirlpool, Jenn-Air, Kenmore, KitchenAid, Maytag, Amana, Magic Chef, Admiral, Norge, and Roper models of washing machines.
Weight : 14.02 lbs
Package Dimension : 31.63 x 8.50 x 7.25
Compatible Brands


About this product
Control console works with some Whirlpool, Jenn-Air, Kenmore, KitchenAid, Maytag, Amana, Magic Chef, Admiral, Norge, and Roper models of washing machines.
Weight : 14.02 lbs
Package Dimension : 31.63 x 8.50 x 7.25
Step 1: Unplug the power cord of your Whirlpool W11135391 Washer and shut off the water supply. Then, turn off the washer valves located at the back of the washer.
Step 2: Carefully tilt the washer back by adjusting the leveling legs. Using a flathead screwdriver, gently remove the screws that are holding the top lid in place. When the top lid is freed, lift it up and locate the screws at the back of the washer that are securing the control console.
Step 3: Remove the screws and carefully disconnect the two wiring harnesses from the back of the control console. Save the wiring harnesses as you'll need them when installing the new control console.
Step 4: Take the new control console and plug in the two wiring harnesses. Make sure they are securely connected.
Step 5: Secure the new control console in the same position using the screws you removed earlier.
Step 6: Reattach the top lid of the washer and secure it with the screws.
Step 7: Adjust the legs to lower the washer back into place. Make sure the washer is leveled before reconnecting the water supply and turning on the washer valves located at the back of the washer.
Step 8: Finally, plug in the power cord and turn on the washer. You now have successfully replaced the W11135391 Whirlpool Washer Control Console!
Please keep in mind, these instructions are for general guidance and should always be used in conjunction with the manufacturer's manual, if available.


