Online Sale!
100% Guaranteed Genuine Parts
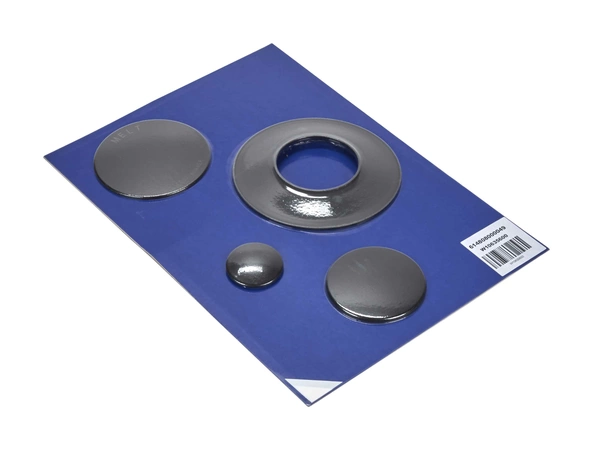
W10811958 Whirlpool Surface Burner Cap
Maintain the performance of your gas range with the Whirlpool surface burner cap, designed for durability and precision. This high-quality replacement part is compatible with a wide range of brands, including Admiral, Amana, Jenn-Air, Kenmore, Kitchenaid, Magic Chef, Maytag, Norge, and Roper. Perfect for maintaining optimal cooking conditions, this burner cap ensures even heat distribution, promoting efficient cooking and minimizing flare-ups. Crafted for easy installation, it helps restore your appliance's functionality without hassle, making it a reliable choice for any kitchen enthusiast. Ensure your cooking experience remains seamless with this essential appliance part, designed to keep your range looking and performing its best.
Weight : 1.30 lbs
Package Dimension : 15.00 x 11.50 x 0.25
Compatible Brands

About this product
Maintain the performance of your gas range with the Whirlpool surface burner cap, designed for durability and precision. This high-quality replacement part is compatible with a wide range of brands, including Admiral, Amana, Jenn-Air, Kenmore, Kitchenaid, Magic Chef, Maytag, Norge, and Roper. Perfect for maintaining optimal cooking conditions, this burner cap ensures even heat distribution, promoting efficient cooking and minimizing flare-ups. Crafted for easy installation, it helps restore your appliance's functionality without hassle, making it a reliable choice for any kitchen enthusiast. Ensure your cooking experience remains seamless with this essential appliance part, designed to keep your range looking and performing its best.
Weight : 1.30 lbs
Package Dimension : 15.00 x 11.50 x 0.25
DIY Guide to Replacing Whirlpool W10811958 CAP-BURNER
Replacing the Whirlpool W10811958 CAP-BURNER is a simple do-it-yourself (DIY) repair. With some basic tools, you can replace this part on your own. Follow these easy steps to replace the Whirlpool W10811958 CAP-BURNER.
Step 1: Disconnect the Power Supply
For safety reasons, it’s important to disconnect the power supply to the appliance before attempting any repairs. Unplug the appliance and turn off the gas supply to the oven.
Step 2: Remove Existing CAP-BURNER
Open the oven door to access the existing CAP-BURNER. Carefully remove the old CAP-BURNER by removing the screws that are holding it in place. Once the screws are removed, carefully lift out the old CAP-BURNER.
Step 3: Install New CAP-BURNER
Place the new CAP-BURNER into position. Secure the new CAP-BURNER with the screws that were used to attach the old one. Make sure the screw holes line up and the CAP-BURNER is secure.
Step 4: Test New CAP-BURNER
Once the new CAP-BURNER is installed, it’s time to test it. Plug the power supply back into the appliance and turn on the gas supply. Turn on the oven and check for any leaks around the new CAP-BURNER. If there are no leaks, the installation was successful.
Your Whirlpool W10811958 CAP-BURNER is now replaced. By following these easy steps, you can quickly and easily replace this part on your own. For more DIY tips and tricks, visit our website and blog.
Please keep in mind, these instructions are for general guidance and should always be used in conjunction with the manufacturer's manual, if available.


