Online Sale!
100% Guaranteed Genuine Parts
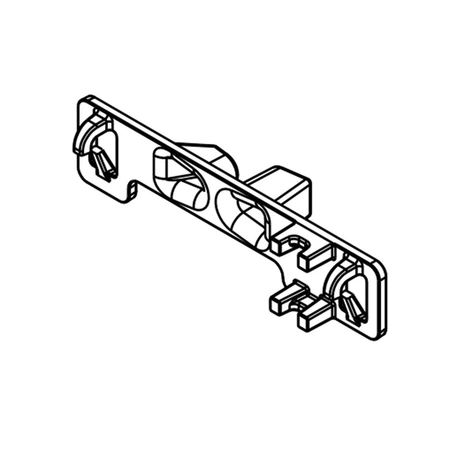
W10803790 Whirlpool Dishwasher Dishrack Tine Tips
Restore your dishwasher's efficiency with these high-quality tine tips, designed specifically for Whirlpool models. This essential replacement part enhances the functionality of your dish rack, ensuring that dishes, glasses, and utensils stay securely in place during washing cycles. Crafted for durability, these tine tips are compatible with a range of brands including Admiral, Amana, Jenn-Air, Kenmore, Kitchenaid, Magic Chef, Maytag, Norge, Roper, and Whirlpool. With an easy installation process, you can have your washer up and running in no time. Don't let worn-out tine tips affect your dishwashing performance—choose these reliable replacements to maintain the optimal operation of your appliance. Ensure sparkling clean dishes with every load!
Weight : 0.14 lbs
Package Dimension : 4.92 x 3.46 x 1.10
Compatible Brands

About this product
Restore your dishwasher's efficiency with these high-quality tine tips, designed specifically for Whirlpool models. This essential replacement part enhances the functionality of your dish rack, ensuring that dishes, glasses, and utensils stay securely in place during washing cycles. Crafted for durability, these tine tips are compatible with a range of brands including Admiral, Amana, Jenn-Air, Kenmore, Kitchenaid, Magic Chef, Maytag, Norge, Roper, and Whirlpool. With an easy installation process, you can have your washer up and running in no time. Don't let worn-out tine tips affect your dishwashing performance—choose these reliable replacements to maintain the optimal operation of your appliance. Ensure sparkling clean dishes with every load!
Weight : 0.14 lbs
Package Dimension : 4.92 x 3.46 x 1.10
The following parts are replaced by this product
- W10671900
How to Replace the Whirlpool W10803790 Positioner
Replacing the Whirlpool W10803790 Positioner is a simple DIY job that can be completed in a few steps. With the right tools and some patience, you can easily restore your machine’s performance and extend its life. Here’s what you’ll need to do to successfully replace the positioner:
Step 1: Preparing for the Replacement
The first step when replacing a positioner is to unplug your machine. This will ensure that your safety while working with electricity. After the machine is unplugged, you should remove the access panels to expose the internal components of the machine.
Step 2: Identifying the Old Positioner
Identify the old positioner by accessing the documentation for your model of appliance. You can usually find this information online or by referring to your owner’s manual. Take note of the exact type and model of the old positioner, so that you can find an appropriate replacement.
Step 3: Removing the Old Positioner
Once you have identified the old positioner, you can begin to remove it. To make the process easier, use a pair of pliers to grip the positioner’s terminals and carefully pull it away from the rest of the assembly.
Step 4: Installing the New Positioner
Once the old positioner is removed, you can now install the new one. Make sure to align the terminals on the new positioner with the corresponding terminals on the machine. Once this is complete, you can gently but firmly push the positioner back into place.
Step 5: Testing the New Positioner
After the new positioner is installed, you should test it to make sure it is working properly. You may need to run the machine through a set of tests, depending on the model and make. Be sure to refer to your owner’s manual for specific instructions on testing your machine after a positioner replacement.
With these five simple steps, you can easily and quickly replace your Whirlpool W10803790 Positioner. If you need further assistance, please don’t hesitate to contact your local appliance repair shop. Good luck!
Please keep in mind, these instructions are for general guidance and should always be used in conjunction with the manufacturer's manual, if available.


