Online Sale!
100% Guaranteed Genuine Parts
W10295405 Whirlpool Strike
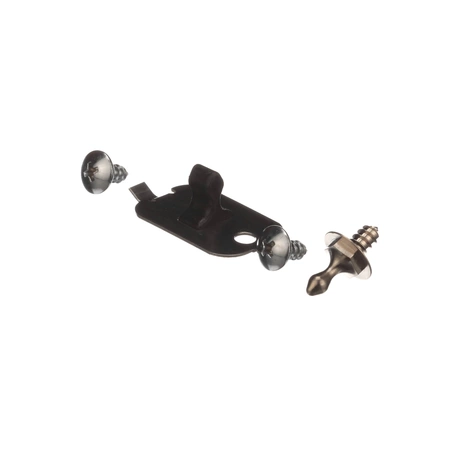
The Dryer Door Strike attaches to the inner door panel to keep the door properly latched. If your dryer door doesn’t close properly, replacing the strike may alleviate the issue. Installing this part will require basic hand tools, minor disassembly of the dryer and novice repair experience. You must unplug the dryer or shut off the house circuit breaker for the appliance before installing this part.
Part Specification
• This product is a Factory Certified Part. These three words represent quality parts and accessories designed specifically for your appliance. Time tested engineering that meets our strict quality specifications
• This product is a replacement part
• Package contains (1) Dryer Door Strike
• Tools Needed: Multi screwdriver
Weight : 0.014400 lbs
Dimension : 1.500000 x 1.000000 x 0.500000
Compatible Brands


About this product
The Dryer Door Strike attaches to the inner door panel to keep the door properly latched. If your dryer door doesn’t close properly, replacing the strike may alleviate the issue. Installing this part will require basic hand tools, minor disassembly of the dryer and novice repair experience. You must unplug the dryer or shut off the house circuit breaker for the appliance before installing this part.
Part Specification
• This product is a Factory Certified Part. These three words represent quality parts and accessories designed specifically for your appliance. Time tested engineering that meets our strict quality specifications
• This product is a replacement part
• Package contains (1) Dryer Door Strike
• Tools Needed: Multi screwdriver
Part Specification
• This product is a Factory Certified Part. These three words represent quality parts and accessories designed specifically for your appliance. Time tested engineering that meets our strict quality specifications
• This product is a replacement part
• Package contains (1) Dryer Door Strike
• Tools Needed: Multi screwdriver
Weight : 0.014400 lbs
Dimension : 1.500000 x 1.000000 x 0.500000
The following parts are replaced by this product
- 8572983
- W10111906
1. Begin by unplugging the Whirlpool W10295405 from its power source.
2. Locate the two pins on the back of the unit and gently lift them out of the slots.
3. Slide the old strike out of its housing and set aside.
4. Place the new strike into the same slots that the old one occupied.
5. Secure the new strike with the two pins that were removed earlier.
6. Plug the unit back into its power source.
7. Test the strike to make sure it is properly secured and functioning.
Please keep in mind, these instructions are for general guidance and should always be used in conjunction with the manufacturer's manual, if available.
Write Your Own Review


