Online Sale!
100% Guaranteed Genuine Parts
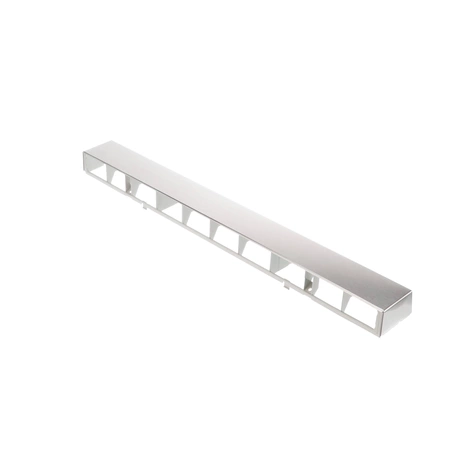
W10245216 Whirlpool Microwave Vent Grille
Maintain your kitchen’s functionality with this high-quality vent grille, designed specifically for Whirlpool microwaves and compatible with a range of other prominent brands such as Amana, Kenmore, and Kitchenaid. This durable part not only enhances the aesthetic appeal of your appliance but also ensures optimal ventilation to maintain efficient cooking performance. Crafted to fit seamlessly into your microwave, the grille and kickplate combination is essential for protecting internal components while promoting airflow. Installation is straightforward, making it an excellent choice for DIY enthusiasts aiming to restore their appliance to its original condition. Maintain your cooking experience while ensuring reliable operation with this essential microwave component.
Weight : 3.56 lbs
Package Dimension : 30.83 x 5.04 x 3.19
Compatible Brands


About this product
Maintain your kitchen’s functionality with this high-quality vent grille, designed specifically for Whirlpool microwaves and compatible with a range of other prominent brands such as Amana, Kenmore, and Kitchenaid. This durable part not only enhances the aesthetic appeal of your appliance but also ensures optimal ventilation to maintain efficient cooking performance. Crafted to fit seamlessly into your microwave, the grille and kickplate combination is essential for protecting internal components while promoting airflow. Installation is straightforward, making it an excellent choice for DIY enthusiasts aiming to restore their appliance to its original condition. Maintain your cooking experience while ensuring reliable operation with this essential microwave component.
Weight : 3.56 lbs
Package Dimension : 30.83 x 5.04 x 3.19
DIY Instructions for Replacing a Whirlpool W10245216 Grill-Vent
1. Unplug the Whirlpool appliance from the power supply.
2. Locate the grill-vent that needs to be replaced. On a bottom freezer refrigerator, the vent will usually be near the top edge of the freezer door. On a side-by-side fridge, it will usually be located near the top of the refrigerator door.
3. Remove the screws from the panel. Use a screwdriver to remove the screws holding the panel in place. There should be two or three screws that need to be removed.
4. Lift the panel off the refrigerator and set it aside.
5. Disconnect the wiring harness from the old Grill-Vent. Disconnect the wiring harness by sliding it off the four pins on the Grill-Vent.
6. Carefully remove the old Grill-Vent from the mounting panel.
7. Take the new Whirlpool Grill-Vent and slide it onto the mounting panel.
8. Secure the Grill-Vent with the screws that were previously removed. Make sure to tighten them securely.
9. Reconnect the wiring harness to the four pins on the new Grill-Vent.
10. Place the panel back onto the refrigerator and secure it with the screws.
11. Plug the appliance back into the power supply.
Congratulations! You have now replaced your Whirlpool W10245216 Grill-Vent!
Please keep in mind, these instructions are for general guidance and should always be used in conjunction with the manufacturer's manual, if available.


