Online Sale!
100% Guaranteed Genuine Parts
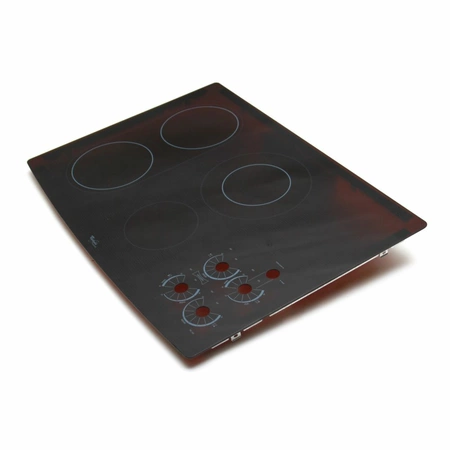
W10239865 Whirlpool Glass Maintop
W10239865 Whirlpool Glass Maintop
Weight : 135.97 lbs
Package Dimension : 30.00 x 21.00 x 30.00
Compatible Brands

About this product
W10239865 Whirlpool Glass Maintop
Weight : 135.97 lbs
Package Dimension : 30.00 x 21.00 x 30.00
The following parts are replaced by this product
- 9762689
- W10048360
- 8286939
- 9762692
- W10140991
Replacing the Whirlpool W10239865 COOKTOP
1. Unplug the cooktop from its electrical power source and turn off the gas valve.
2. Detach the grates and remove the burner caps.
3. Unscrew the screws underneath the cooktop to disconnect it from the counter.
4. Slide the cooktop out of position.
5. Take measurements of the new cooktop to check for proper fit.
6. Lift the new cooktop into place, making sure it’s level.
7. Secure the cooktop to the counter using screws.
8. Connect any necessary electric wiring and attach the gas connection hose if applicable.
9. Plug your cooktop back into its power source.
10. Turn the gas valve on and check for leaks.
11. Place the new burner caps and grates over the cooktop.
12. Test the cooktop by turning on all the burners. Make sure there’s no issue with sparking or gas smells.
13. Once you’re satisfied with the cooktop’s performance, you can begin cooking!
Please keep in mind, these instructions are for general guidance and should always be used in conjunction with the manufacturer's manual, if available.


