Online Sale!
100% Guaranteed Genuine Parts
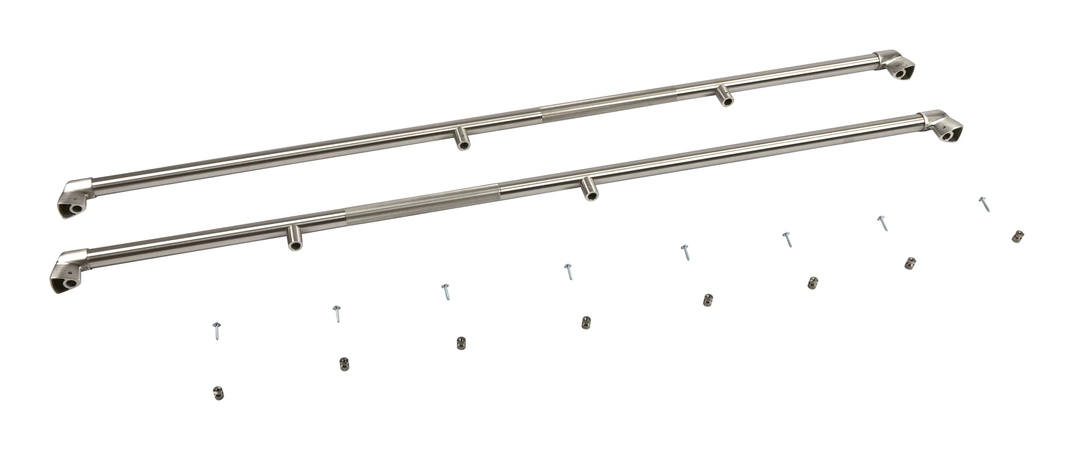
W10182908 Whirlpool Refrigerator Handle Assembly
Maintain the functionality and appearance of your refrigerator with this durable handle assembly designed specifically for select models. Crafted by Whirlpool, this high-quality replacement part ensures a perfect fit and easy installation, making it ideal for anyone in need of an Maintain or repair. Compatible with a range of brands, including Admiral, Amana, Jenn-Air, Kenmore, Kitchenaid, Magic Chef, Maytag, Norge, and Roper, this handle assembly offers versatility across different appliances. Engineered to withstand daily use, it maintains the integrity and style of your refrigerator, ensuring ease of access every time you open the door. Invest in this essential part to restore the efficiency and look of your kitchen appliance today.
Package Dimension : 6.32 x 4.32 x 64.94
Compatible Brands


About this product
Maintain the functionality and appearance of your refrigerator with this durable handle assembly designed specifically for select models. Crafted by Whirlpool, this high-quality replacement part ensures a perfect fit and easy installation, making it ideal for anyone in need of an Maintain or repair. Compatible with a range of brands, including Admiral, Amana, Jenn-Air, Kenmore, Kitchenaid, Magic Chef, Maytag, Norge, and Roper, this handle assembly offers versatility across different appliances. Engineered to withstand daily use, it maintains the integrity and style of your refrigerator, ensuring ease of access every time you open the door. Invest in this essential part to restore the efficiency and look of your kitchen appliance today.
Package Dimension : 6.32 x 4.32 x 64.94
No more associated models for this part.
Replacing the Whirlpool 2306996 GASKET-FIP
1. Disconnect the power to the appliance: turn off the power switch or unplug the electrical cord from the wall outlet.
2. Turn off the gas valve, typically located near the bottom of the appliance.
3. Open up the appliance and locate the Gasket-FIP.
4. Remove any screws holding the gasket in place and carefully remove the old gasket.
5. Make sure the mounting surface is clean and dry before applying a thin coat of plumbers’ putty if desired.
6. Place the new Gasket-FIP into the area, being careful not to over tighten the mounting screws.
7. Replace any insulation that may have been removed during the process.
8. Turn on the gas valve and then turn on the power to the appliance.
9. Test the connection to make sure it is secure.
10. Finally, test the appliance for proper operation.
Please keep in mind, these instructions are for general guidance and should always be used in conjunction with the manufacturer's manual, if available.


