Online Sale!
100% Guaranteed Genuine Parts
JGA8100ADB Whirlpool Cooktop Black Two Burner Cartridge
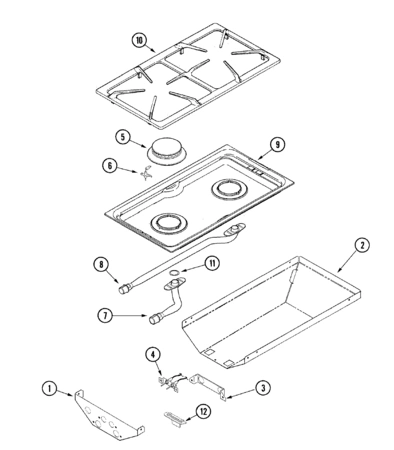
The JGA8100ADB Whirlpool Black Cooktop Two Burner Cartridge is a genuine OEM (original equipment manufacturer) part made by Whirlpool Appliances. Works with Whirlpool, Maytag, Sears and Kenmore Gas Ranges. 2 Burner designer line modular gas cooktops and Pro-Style® Modular Gas Cooktop. One-Piece Porcelain-On-Cast Iron Burner Grates. Two Sealed Burners. We are a Factory Authorized Parts Distributor for Whirlpool Maytag Jenn-Air. Trust us for all of your Whirlpool Maytag Jenn-Air appliance parts and accessories needs.
Weight : 11.87 lbs
Package Dimension : 11.38 x 5.50 x 24.50
Compatible Brands


About this product
The JGA8100ADB Whirlpool Black Cooktop Two Burner Cartridge is a genuine OEM (original equipment manufacturer) part made by Whirlpool Appliances. Works with Whirlpool, Maytag, Sears and Kenmore Gas Ranges. 2 Burner designer line modular gas cooktops and Pro-Style® Modular Gas Cooktop. One-Piece Porcelain-On-Cast Iron Burner Grates. Two Sealed Burners. We are a Factory Authorized Parts Distributor for Whirlpool Maytag Jenn-Air. Trust us for all of your Whirlpool Maytag Jenn-Air appliance parts and accessories needs.
Weight : 11.87 lbs
Package Dimension : 11.38 x 5.50 x 24.50
The following parts are replaced by this product
- JGA8100ADB
No more associated models for this part.
Step 1: To replace the JGA8100ADB Whirlpool Cooktop Two Burner Cartridge, Black, begin by turning off the power to the cooktop. Make sure the control knobs are in the off position and the elements are not hot before beginning.
Step 2: Lift up on the grates covering the cartridge. Remove the screws that are holding the two burners in place, then take out the burner assembly.
Step 3: With the burner assembly removed, you should be able to access the cartridge and its wiring harness. Unplug the wiring harness and remove the screws that are attaching the cartridge to the cooktop base.
Step 4: Now, take the new cartridge and plug in the wiring harness. Secure the cartridge in place with the screws that you removed earlier.
Step 5: Lastly, put the burner assembly back into place and secure it with the previously-removed screws. Turn on the power to the cooktop and you’re ready to go.
Please keep in mind, these instructions are for general guidance and should always be used in conjunction with the manufacturer's manual, if available.


