Online Sale!
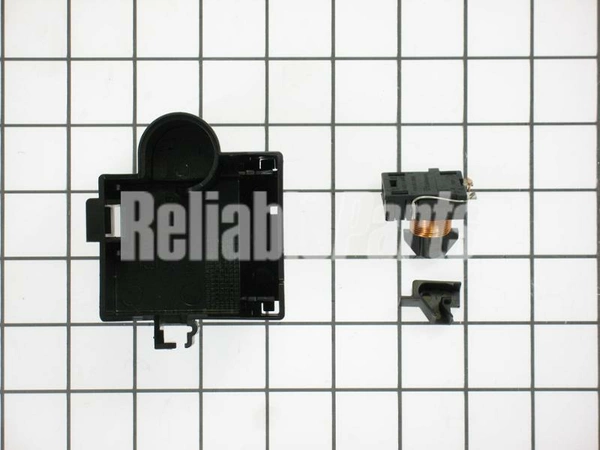
80-54377-00 U-Line Overload Relay
This U-Line 80-54377-00 OVERLOAD/RELAY is a must-have. With its impressive performance and reliable durability, this overload/relay from U-Line won't let you down. We're your #1 source for genuine OEM appliance parts. Contact us for further questions as well as any other appliance parts needs!
Weight : 0.20 lbs
Package Dimension : 3.98 x 2.87 x 2.48
Compatible Brands

About this product
This U-Line 80-54377-00 OVERLOAD/RELAY is a must-have. With its impressive performance and reliable durability, this overload/relay from U-Line won't let you down. We're your #1 source for genuine OEM appliance parts. Contact us for further questions as well as any other appliance parts needs!
Weight : 0.20 lbs
Package Dimension : 3.98 x 2.87 x 2.48
The following parts are replaced by this product
- 5414
- 5413
DIY U-Line 80-54377-00 OVERLOAD/RELAY Replacement
If you have a U-Line 80-54377-00 overload/relay that needs to be replaced, then this DIY guide is for you. Replacing an overload/relay is an easy task that only requires basic tools and knowledge of basic electrical principles. With the right steps, you can get it done in no time!
Tools Needed:
-Screwdriver
-Wire strippers
-Multimeter
-Replacement relay
Step 1: Shut off power to the circuit that the U-Line 80-54377-00 overload/relay is protecting. This will protect you from any electrical shock during the replacement process.
Step 2: Remove the screws that are holding the overload/relay in place. There may be multiple screws depending on the installation configuration. Once all screws are removed, you can now remove the overload/relay from the panel.
Step 3: Visually inspect the old relay for signs of damage or corrosion. If there are any signs of damage or corrosion, then the relay should not be reused and needs to be replaced.
Step 4: Connect the new relay to the panel in the same way as the old one was connected. Make sure all connections are secure and the relay is properly mounted in the panel.
Step 5: Use a multimeter to test all the connections to ensure there are no shorts or other issues that could cause further problems.
Step 6: Once all connections have been tested and confirmed as working, switch on the power to the circuit. Make sure the new relay is functioning properly.
And there you have it! Replacing a U-Line 80-54377-00 overload/relay is not difficult but does require careful attention to detail and a few tools. Following these steps, you can replace an overload/relay in no time!
Please keep in mind, these instructions are for general guidance and should always be used in conjunction with the manufacturer's manual, if available.
Please Verify Your Purchase to Submit a Review
Please note: We use this information only to confirm your purchase, it won’t be published.


