Online Sale!
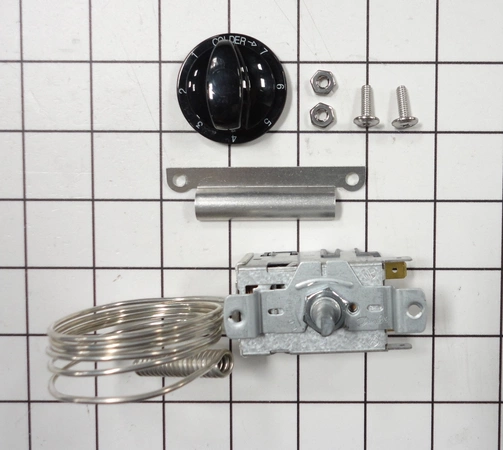
80-54228-00 U-Line Temperature Control Thermostat
80-54228-00 U-Line Temperature Control Thermostat
Weight : 0.40 lbs
Package Dimension : 5.79 x 3.90 x 2.48
Compatible Brands

About this product
80-54228-00 U-Line Temperature Control Thermostat
Weight : 0.40 lbs
Package Dimension : 5.79 x 3.90 x 2.48
The following parts are replaced by this product
- 2767-1
- 2767-S
Replacing the 80-54228-00 U-Line Temperature Control Thermostat – DIY Guide
1. Gather the necessary tools and materials that you will need for the project prior to starting – these include a flat head screwdriver, wire strippers, needle-nose pliers, voltage tester, and a new temperature control thermostat (80-54228-00). It is also important to unplug the refrigerator before beginning the project.
2. Use the flat head screwdriver to remove the screws that are holding the old temperature control thermostat in place.
3. Once the screws are removed, carefully pull the old thermostat away from the wall of the refrigerator, taking note of its wiring connections for later reference.
4. Using the wire strippers, remove the insulation from both ends of each of the wires connected to the old temperature control thermostat in order to expose their tips.
5. Use the needle-nose pliers to gently twist the tips of the wires together, matching the colors of the wires from the old thermostat with the colors of the wires from the new 80-54228-00 thermostat.
6. Connect the new temperature control thermostat to the wall of the refrigerator, making sure it is securely in place.
7. Use the voltage tester to check that the new connection is safe and secure.
8. Turn the power back on to the refrigerator and you’re all set!
You have now successfully replaced the 80-54228-00 U-Line Temperature Control Thermostat! If you’ve followed these steps, you can now enjoy the convenience of having the new thermostat in place.
Please keep in mind, these instructions are for general guidance and should always be used in conjunction with the manufacturer's manual, if available.
Please Verify Your Purchase to Submit a Review
Please note: We use this information only to confirm your purchase, it won’t be published.


